Importance of Purchase Orders
Managing purchase orders from suppliers is an essential element for operating any online store efficiently, as it ensures the availability of required product quantities at the right time and helps maintain a stable inventory that meets customer demand without interruption. With the increasing competition in the e-commerce world, the ability to organize and accurately track supply requests has become a crucial factor in improving performance and ensuring continuity of supply.
Stages of Creating a Purchase Order
1. Log in to the main dashboard that contains all store management tools.
2. On the Left side of the screen, you will find a sidebar with multiple options. Look for the “Inventory” option and click on it.
3. A dropdown menu will appear—select Purchase Orders, and a page will open containing:
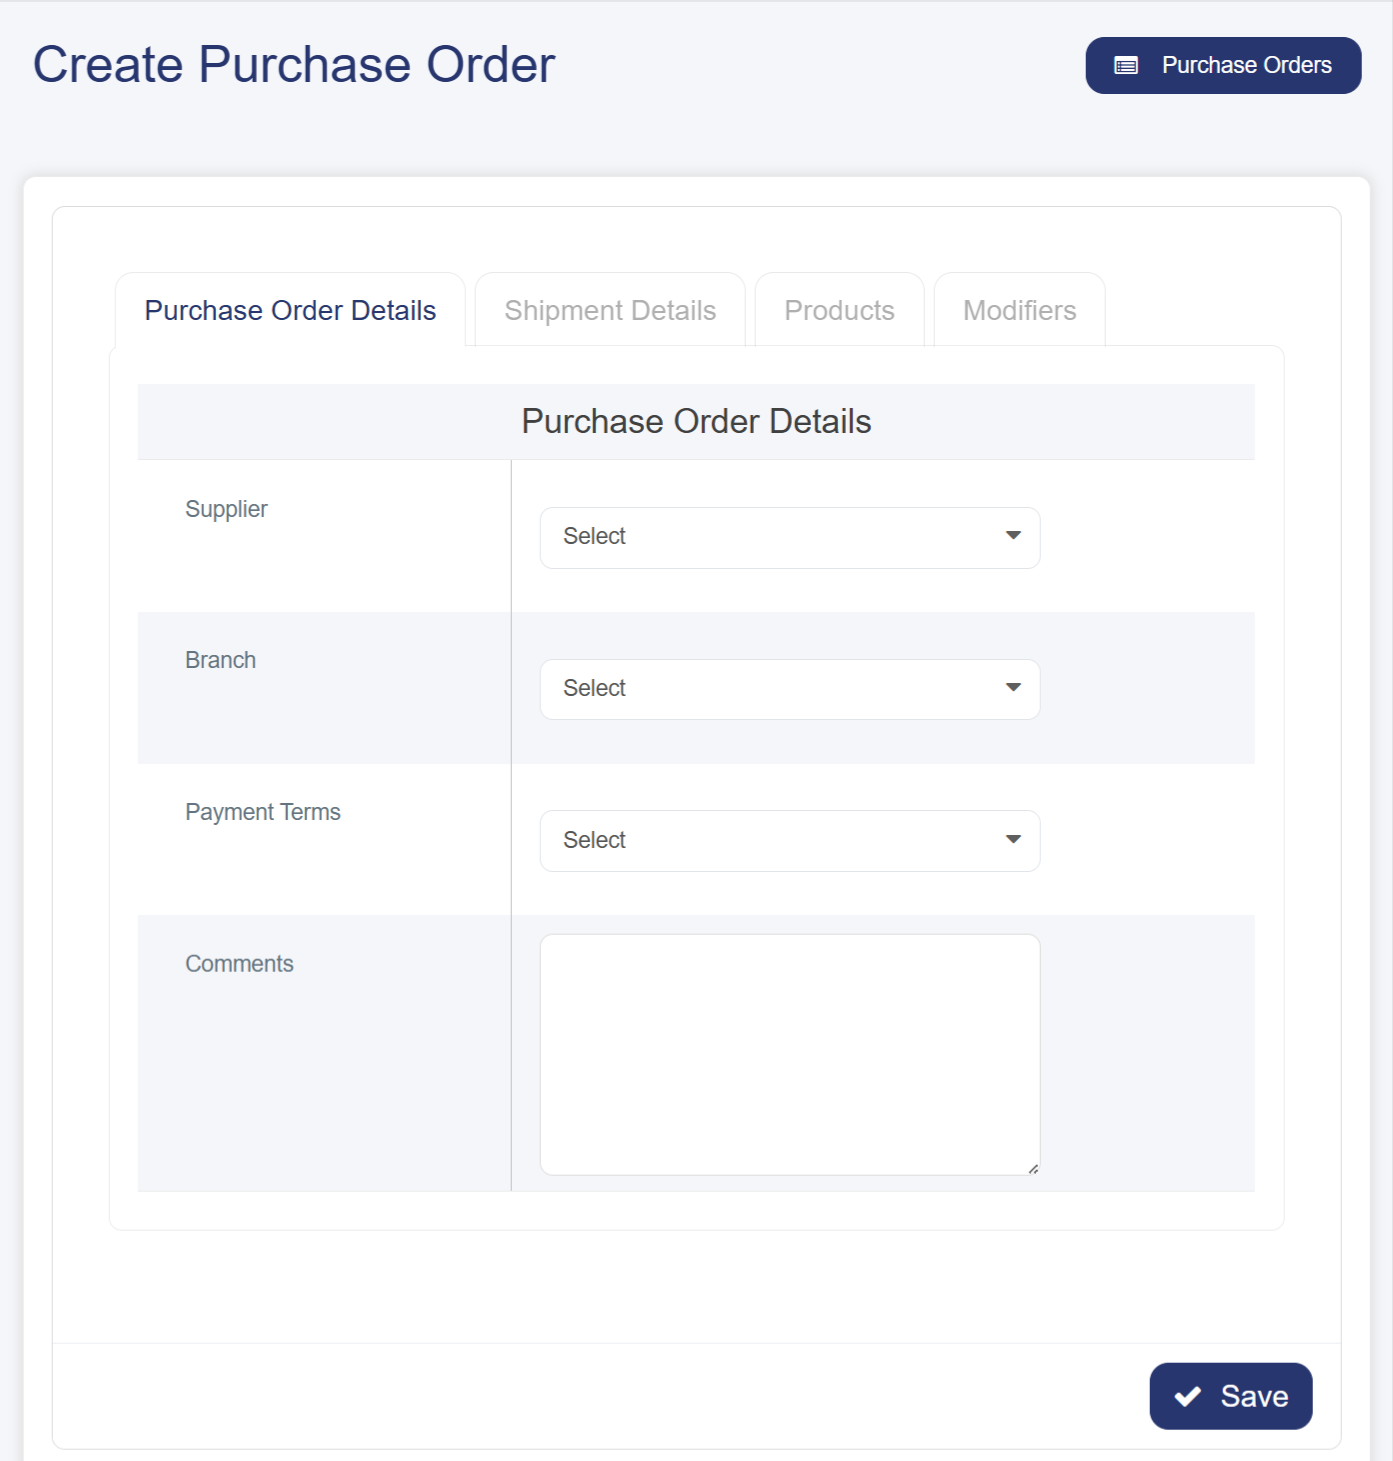
• Add Button: When clicked, a window will appear containing the essential data required to complete the purchase order, including:
§ Basic Order Details
· Select Supplier: Choose the source you will purchase from, whether a local or international supplier.
· Select Branch: Determine the branch designated to receive the goods—an essential step for stores with multiple branches.
· Payment Terms: Specify the agreed payment method, such as immediate or deferred payment.
· Comments: A field for any comments related to the order.
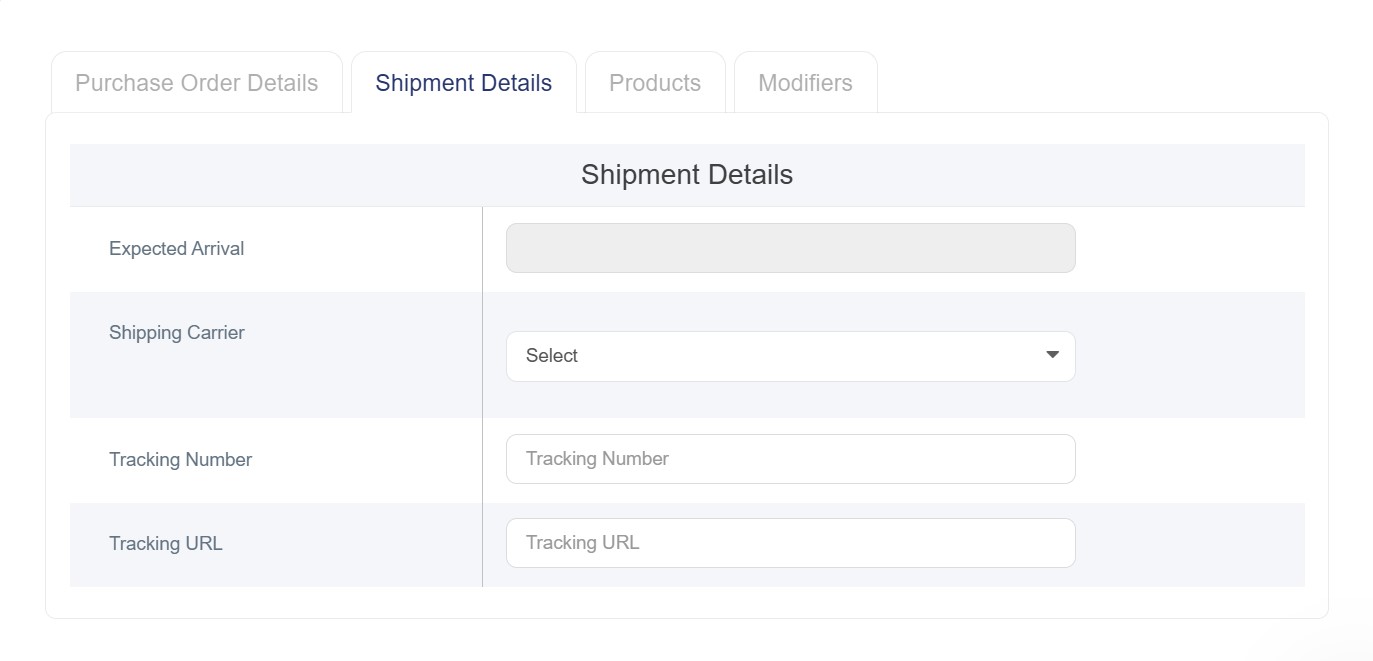
§ Shipment Details
· Expected Arrival Time: Specify the expected date for receiving the goods.
· Shipping Carrier: Select the carrier responsible for delivering the order.
· Shipment Tracking Number: An identifier that allows tracking the shipment throughout its journey.
· Shipment Tracking URL: A direct link to the shipping company’s website for real-time tracking.
§ Adding Products: This is done by entering product names into the search field to quickly locate them within the database, with the ability to add multiple products to build a complete purchase order. A structured table will then appear showing the product name, a field to enter the required quantity, and the price of each product.
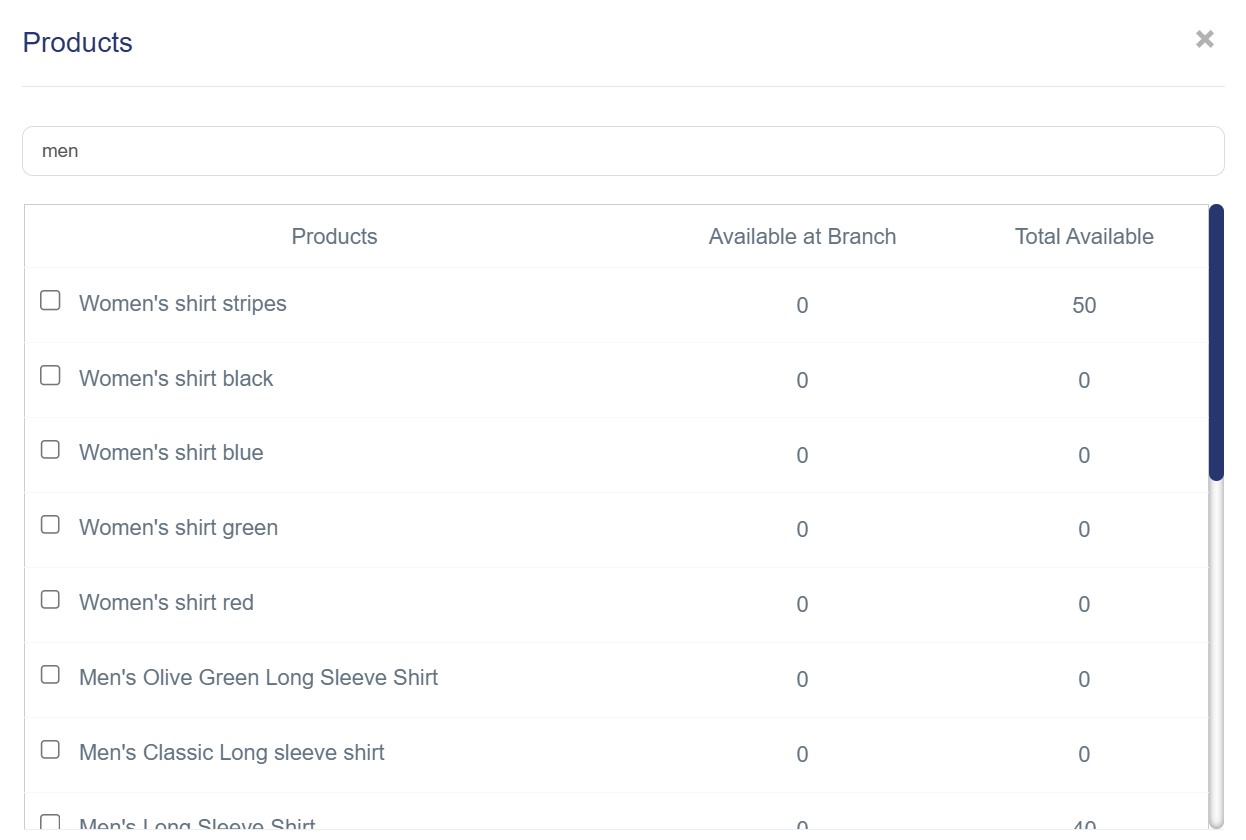
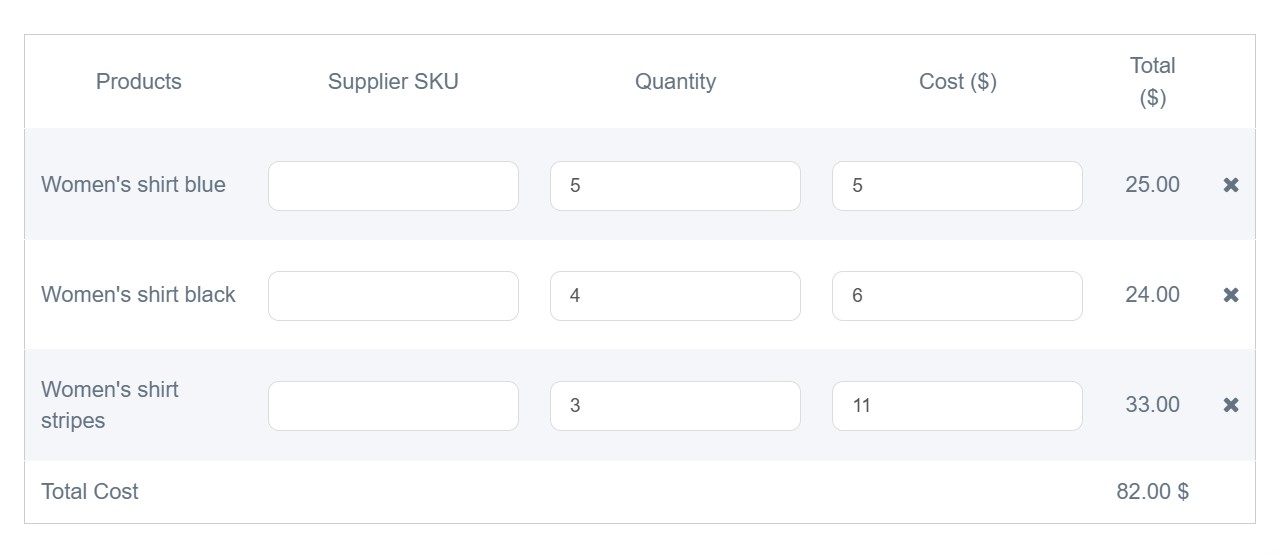
§ Defining Product Attributes: This allows specifying the required quantities for each product’s detailed attributes, such as sizes, colors, and more.
§ Saving the Order: After saving, the purchase order details will appear in an organized table that includes:
· Order Code: A unique identifier for each order
· Supplier: Name of the company or supplier
· Branch: Location where the goods will be received
· Status: Current state of the order (Received, Draft, Ordered)
· Total: Total financial value of the order
· Expected Arrival Time: Scheduled date for receiving the shipment
· Actions: Buttons for viewing, editing, or deleting the order

Difference Between Purchase Order Statuses
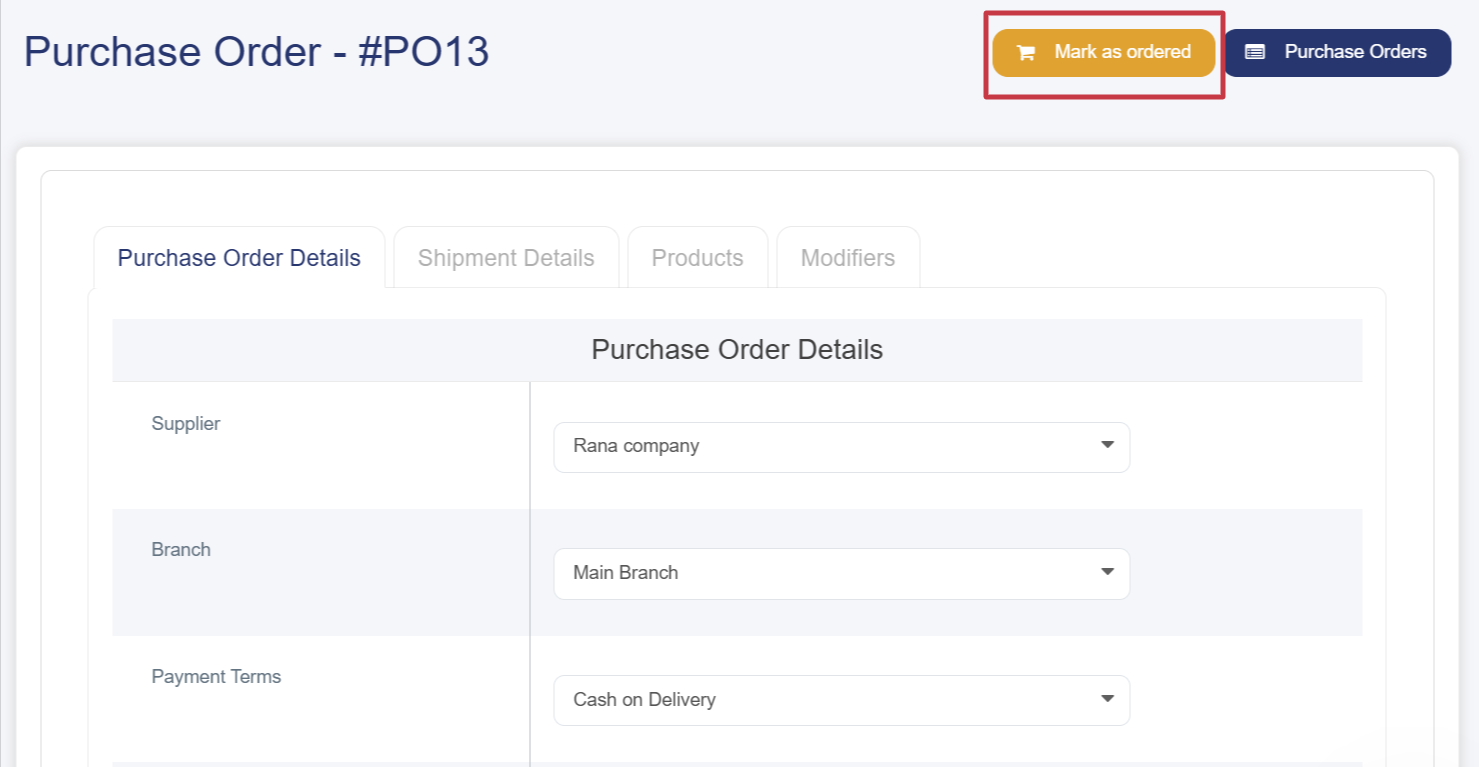
· Draft: The initial status assigned when a purchase order is first created in the system.
· Ordered: This appears when reviewing the draft and verifying its details. A confirmation option appears at the top of the screen, and once marked as ordered, the status changes to “Ordered.”
· Received: Indicates that the order has been received from the supplier and is now available in inventory.
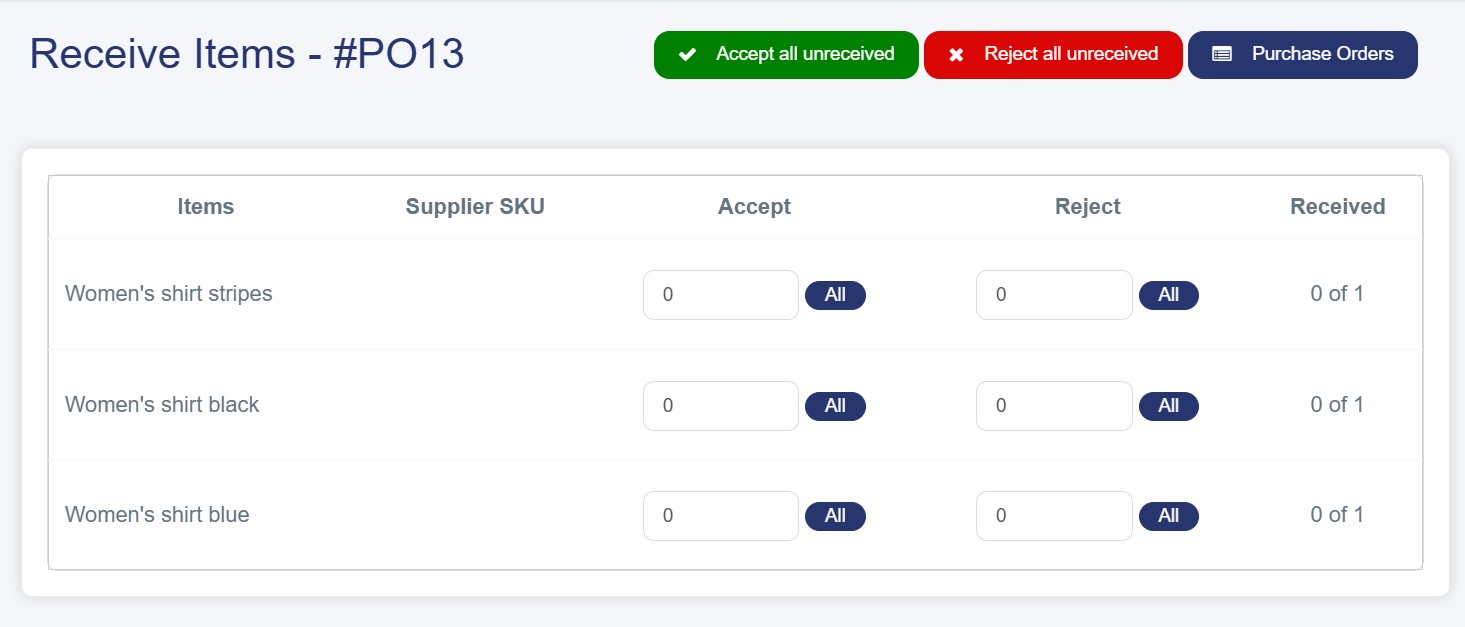
How to Accept or Reject the Shipment or part of it
1. From the Options column, click the View button.
2. A window will appear containing the shipment information, with an option at the top of the screen to mark it as “Ordered.”
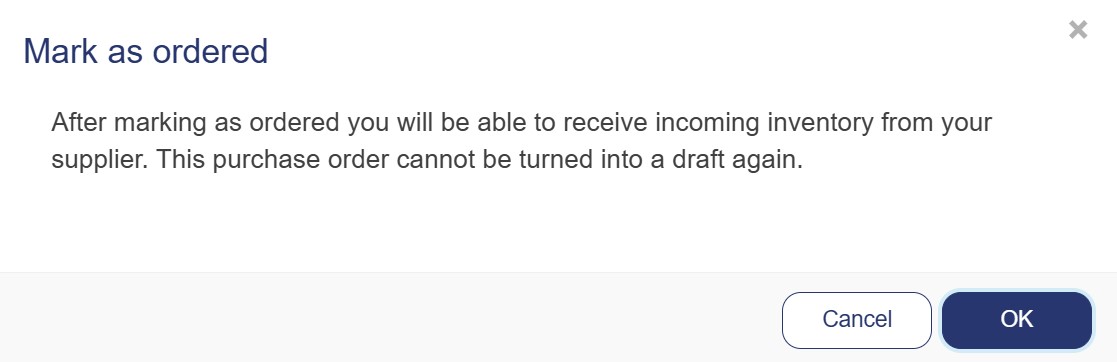
3. A notification will appear indicating that once the order is marked as “Ordered,” it cannot be returned to the draft status. Click OK to proceed.
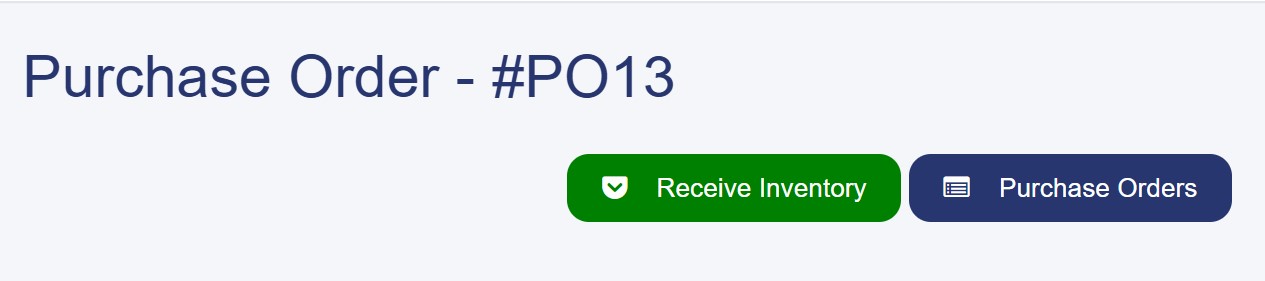
4. After that, the Receive Inventory button will appear in green at the top of the screen.
5. When you click it, you will be directed to a structured table listing the requested products, with two columns Accept and Reject to approve or decline the received items.