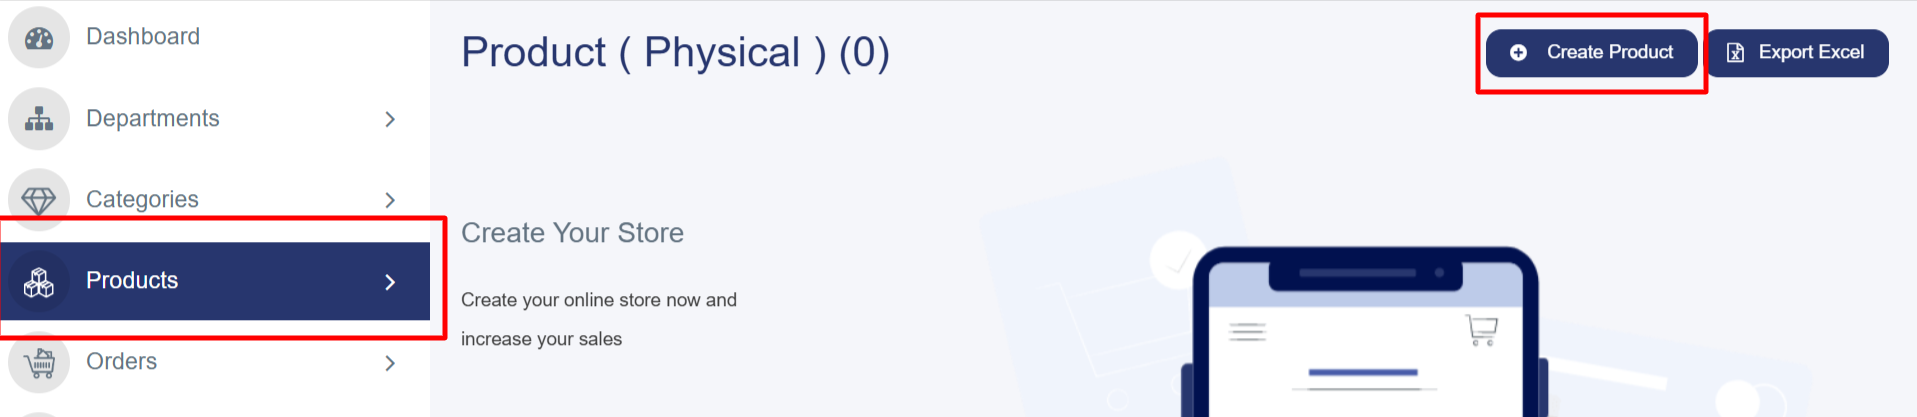
1. Accessing the "Create Product" Page
· From the left sidebar, click on "Products".
· Select "All Products" from the menu.
· Click the blue "Create Product" button located at the top right.
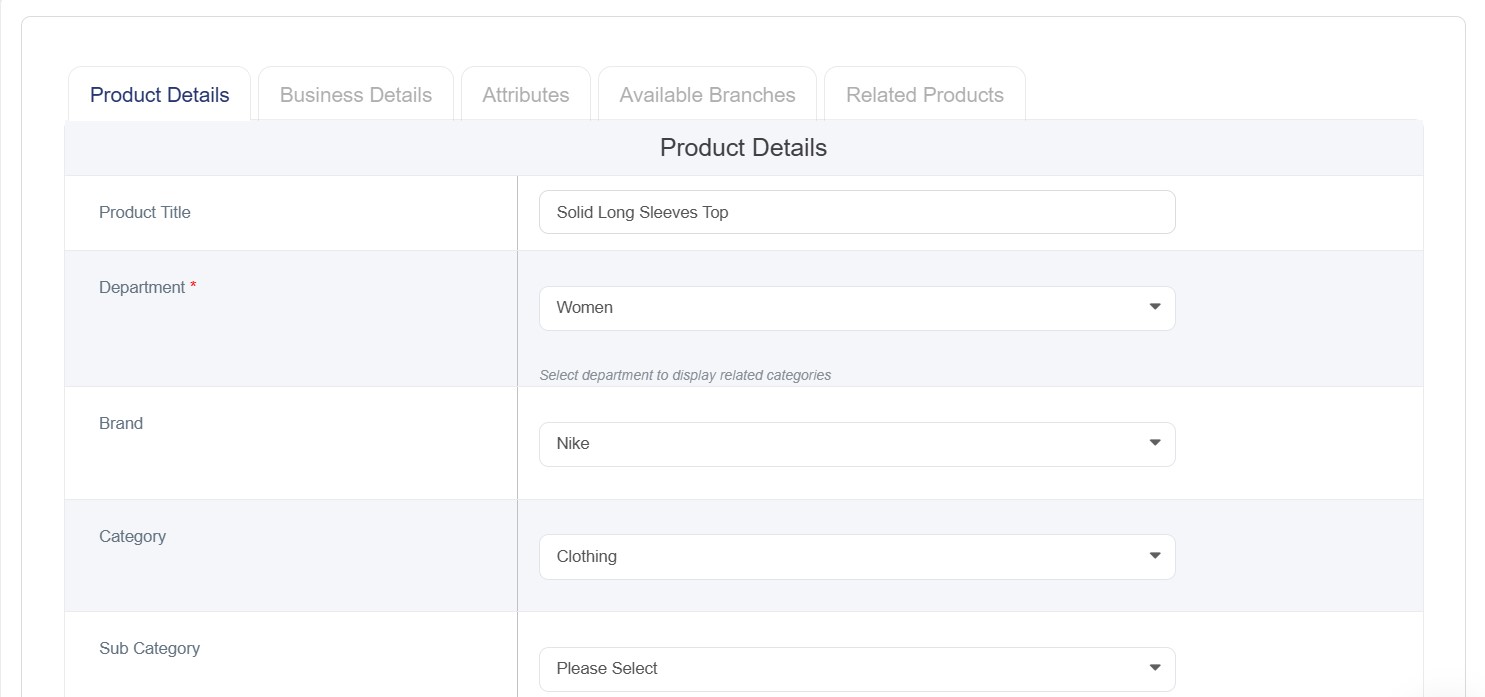
2. Filling in the "Product Details" Tab
Required Options:
- Product Name (English): Enter the product name in English.
- Department: Select the department, the product belongs to from the list like:Computers, Home Appliance.
- Brand: Select the brand for the product after choosing the category.
- Category: Choose the relevant category from the list like: (Accessories, Clothing,Smartphone)
- Product Type: Multi variant product.
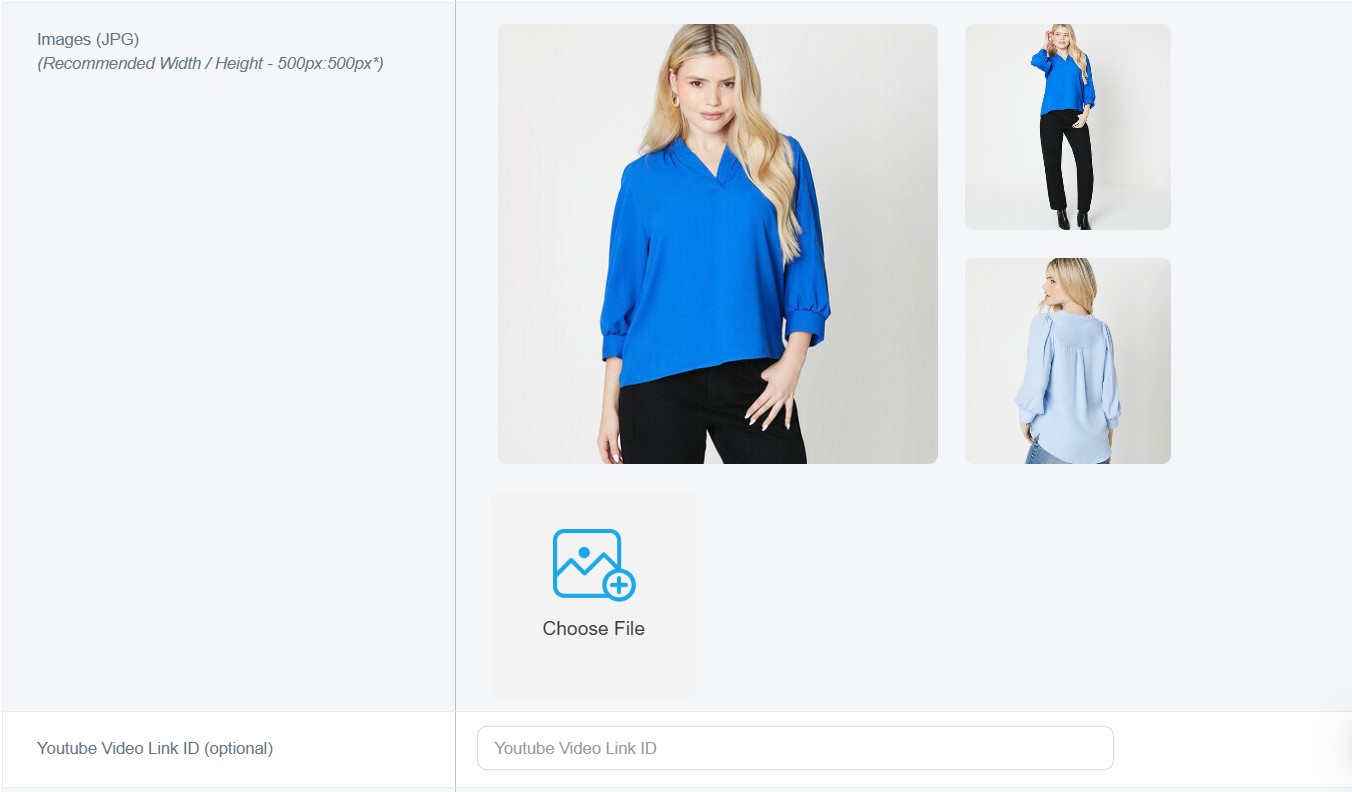
- Product Image: Click "Choose File" to upload the product image. (Dimensions: 500x500 pixels, Format: JPG/JPEG).
- Note: You cannot save the product without uploading an image. If no image is available, we recommend using the default placeholder. You can add up to 20 images.
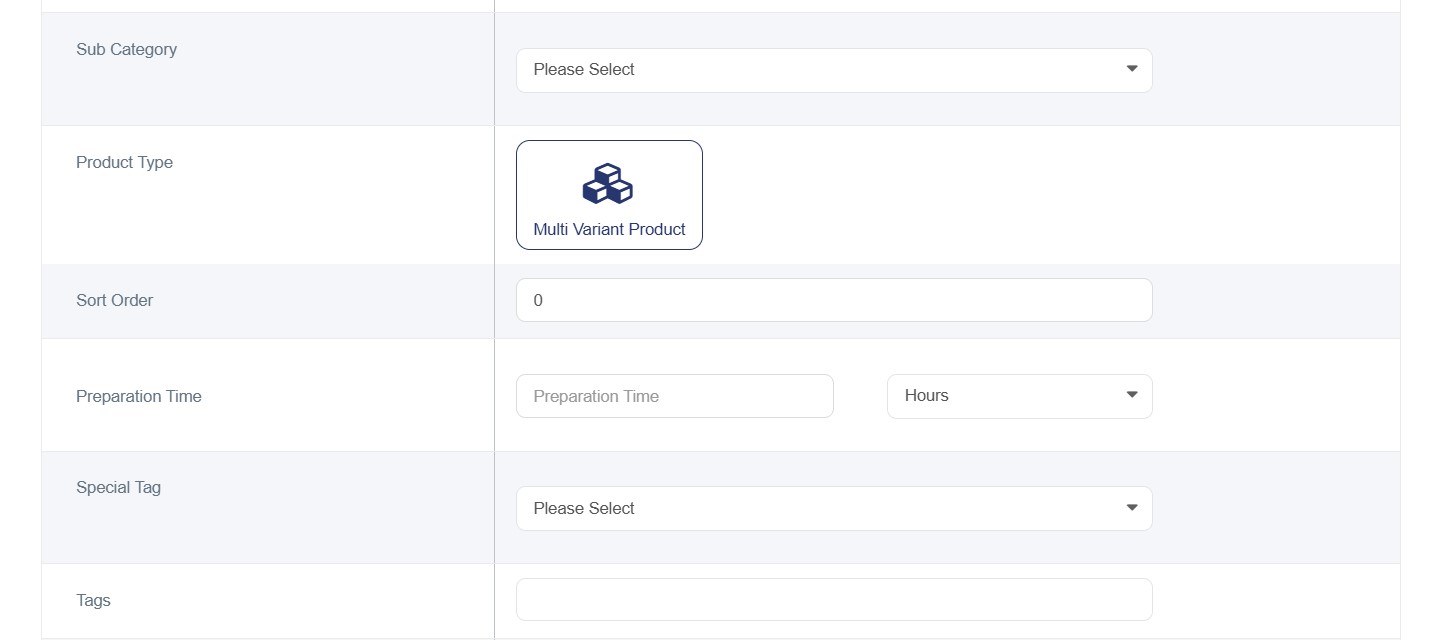
Optional Options:
- Sub-categories: Select the appropriate sub-categories.
- Display Order: Enter the sort order number (lower numbers will appear first).
- Preparation Time: Enter the preparation time, if applicable.
- Special Tag: Add a tag for the product (e.g., New, Limited Edition, Featured Product).
- Keywords: Add relevant keywords for search optimization.
- YouTube Video ID: Add the part of the URL after the "=" sign. For example, if the link is https://www.youtube.com/watch?v=mjovEakZusk, add only mjovEakZusk.
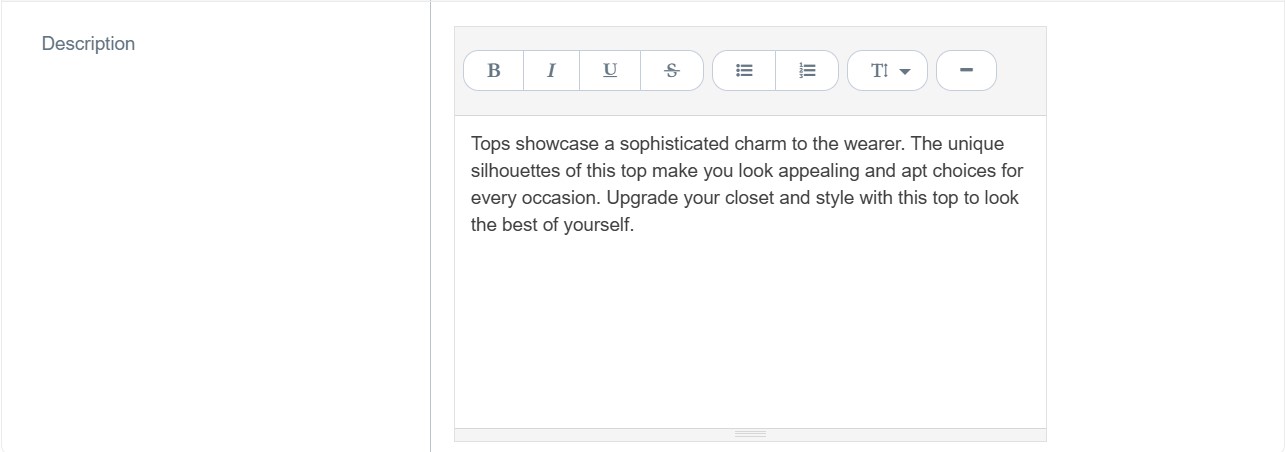
- Description (English): Write a detailed description of the product in English.
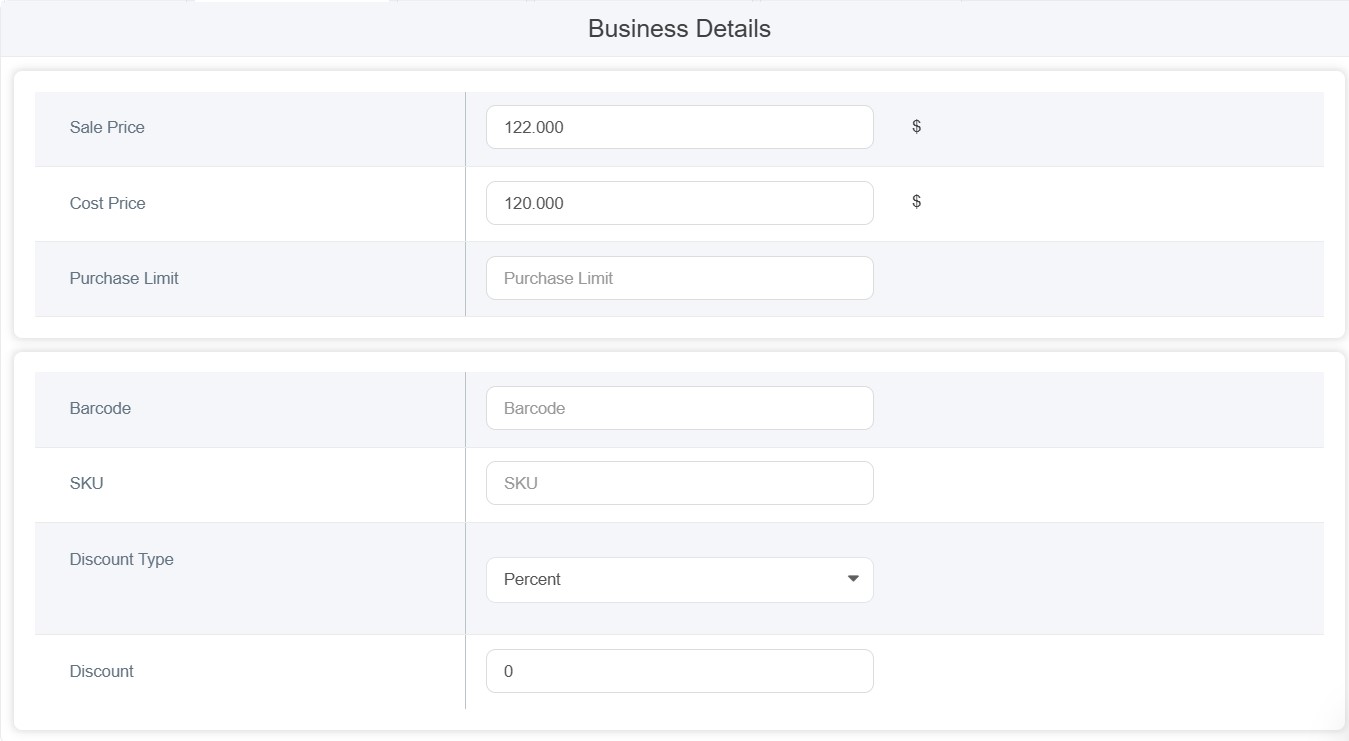
3. Complete Business Details Tab
• Sale Price: Enter the selling price
• Cost Price: Enter the cost price
Note:(Both of prices are required options if you have no values enter”0”)
• Purchase Limit: Set maximum purchase quantity
• Barcode: Enter product barcode
• SKU: Enter Stock Keeping Unit code
• Discount Type: Select discount type from dropdown (it can be either percentage or amount)
• Discount: Enter discount value
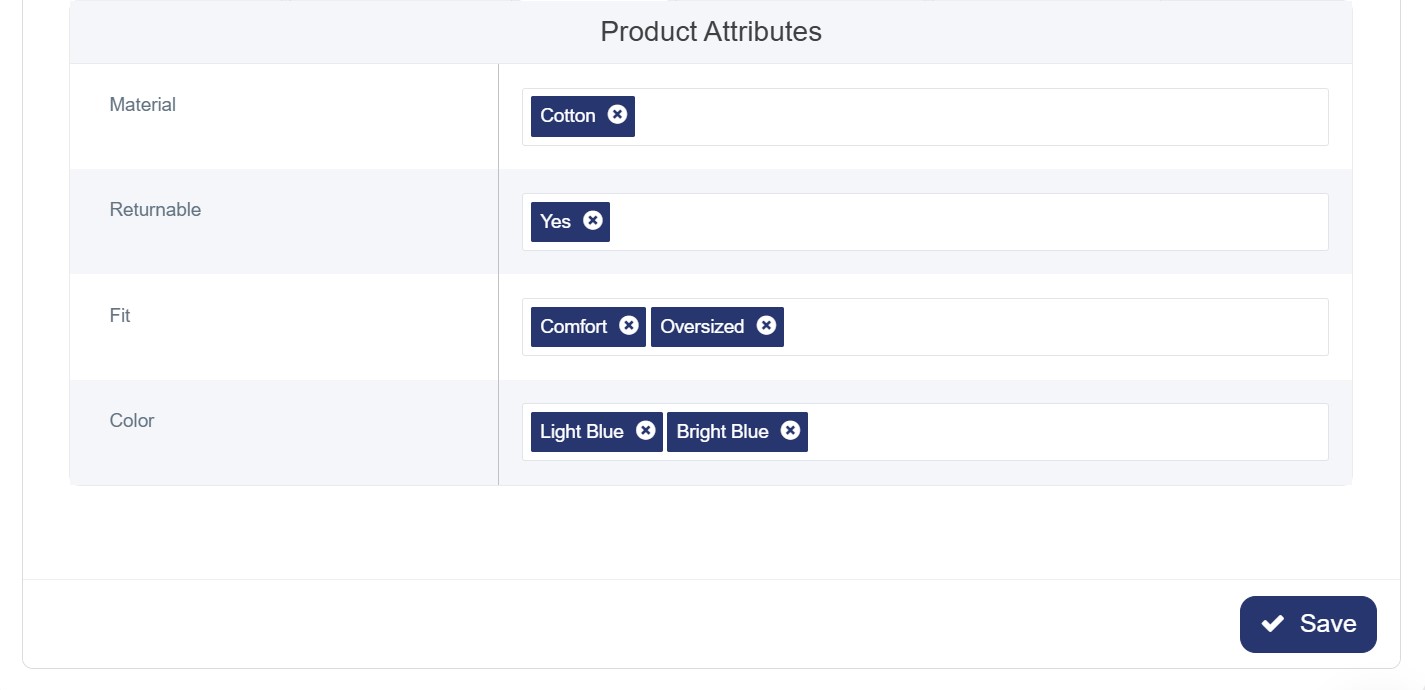
4. Attributes Tab
Once the attributes have been set up in the Attributes Section, the titles will appear as shown in the image below. You can then select the specific attributes relevant to this product:
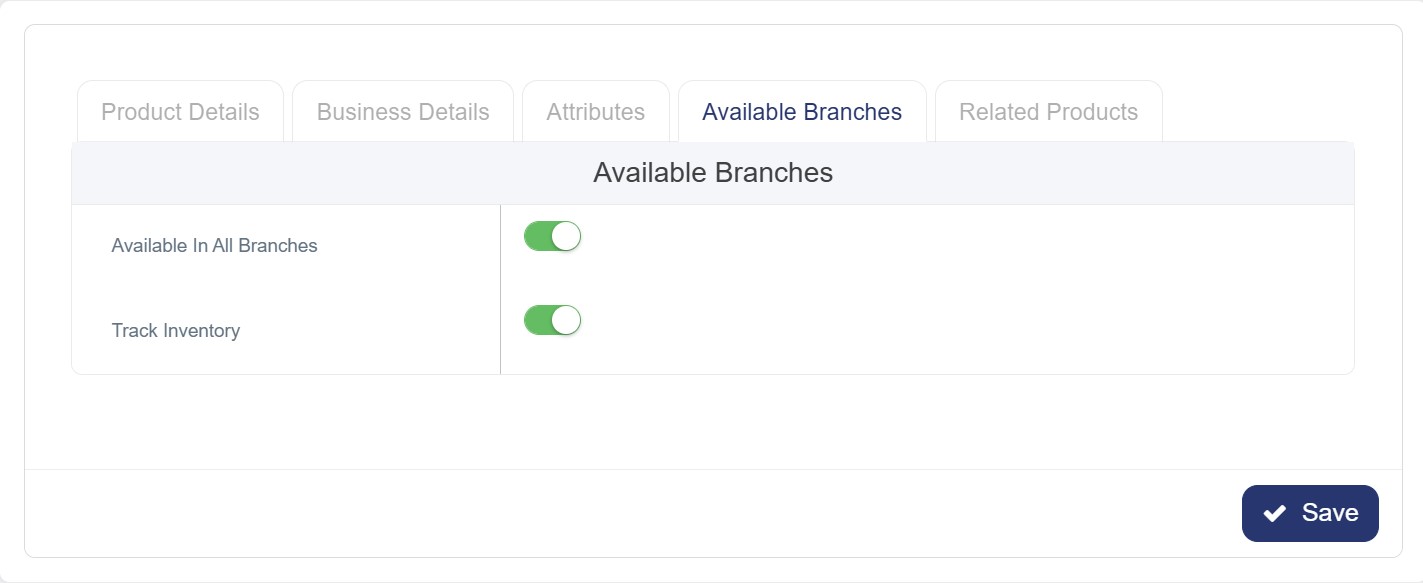
5. Managing the "Available Branches" Tab
• Available in All Branches: Toggle this switch on if the product is available at all locations.
• Select Available Branches: Alternatively, manually select the specific branches where the product will be available.
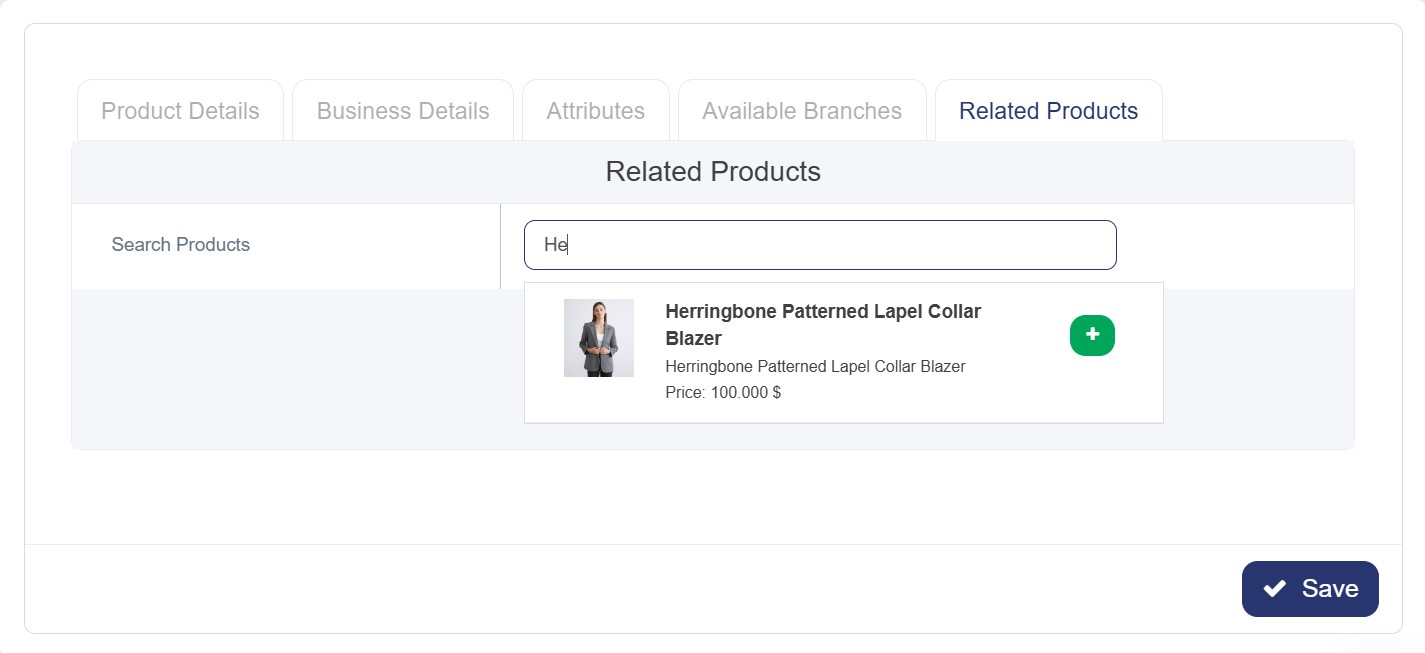
6. Related Products Tab
This tab aims to enhance the user experience by automatically displaying related products when a customer selects a specific item. This helps them discover additional options of interest right on the same page.
Note: To ensure related products appear correctly, you must first add the main products to the system. Once added, you can then select and link the relevant related products to each item.
7. Saving the Product
• Click the blue "Save" button at the bottom right.
• The product will be added to the Product List.
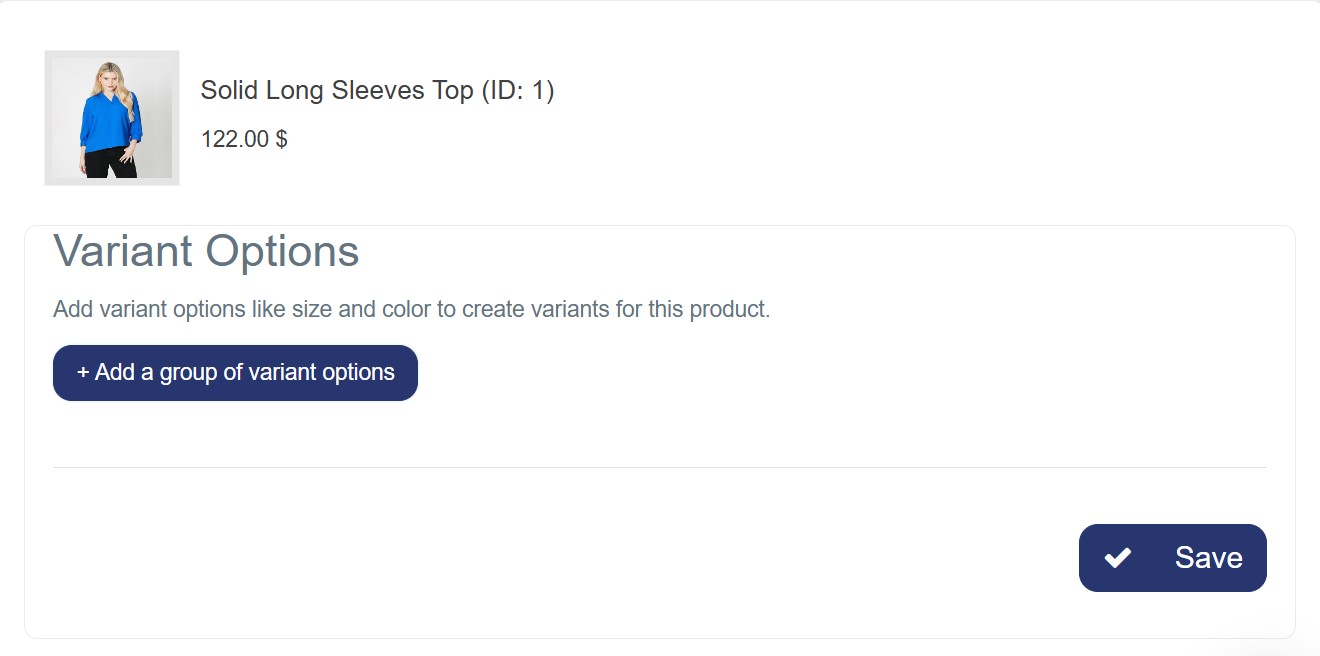
8. Accessing Product Variants
· From the Product List, search for the product you wish to add variants to.
· Click the "Variants" button next to the product name.

9. Adding Variant Options
Once you have accessed the Product Variants page:
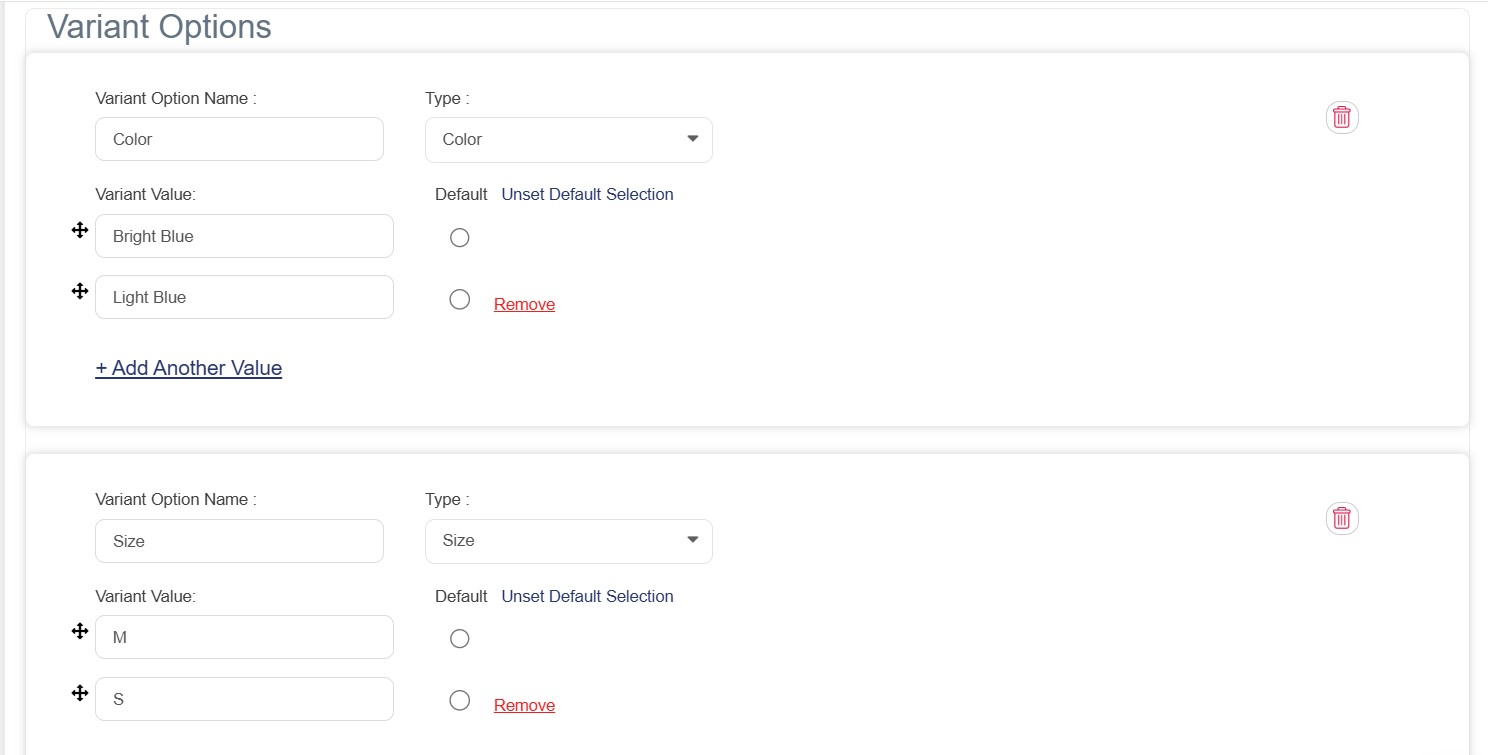
A. Adding Variant Option Names
· Variant Option Name (English): Enter the variant type in English (e.g., Size, Color).
· Type: Select the display type from the dropdown menu (Single Choice, Dropdown, Color, or Size).
B. Adding Variant Values
· Variant Value (English): Enter the first value in English (e.g., Red, XL).
· Default: Select the radio button if you want this to be the default selected option.
· Click on "+ Add Another Value" to include more options.
C. Adding Multiple Option Groups (Optional)
If you need to include multiple variant types (e.g., both Size and Color):
· Click the "+ Add Variant Option Group" button.
· Repeat the steps above for the new group.
10. Generating Variants
After adding all variant options and values, click the green "Generate Variants" button at the bottom left. This will create all possible combinations of your selected variants (e.g., Red-Large, Blue-Small).
11. Saving Changes
Ensure you save your product settings to apply all updates.
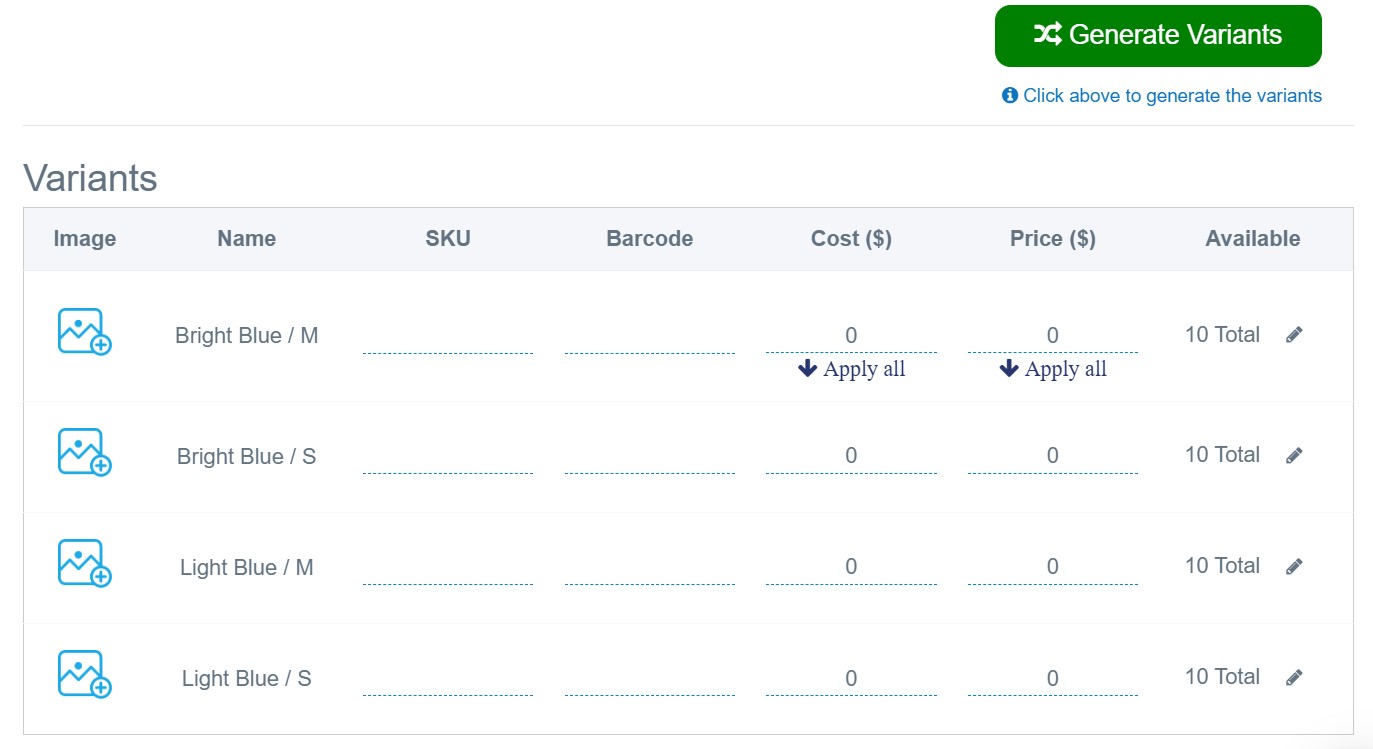
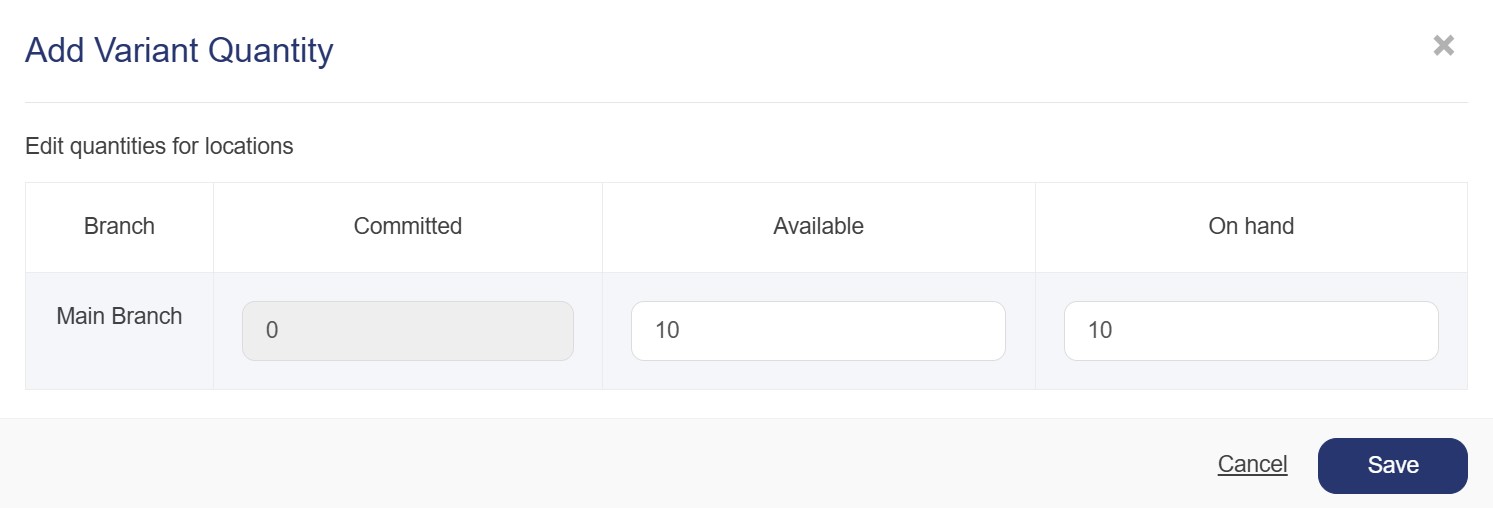
Note: If you do not enter a quantity for each variant combination, the variant will appear as "Out of Stock" on the product page. To prevent this, ensure you add the available stock for each sub-product.
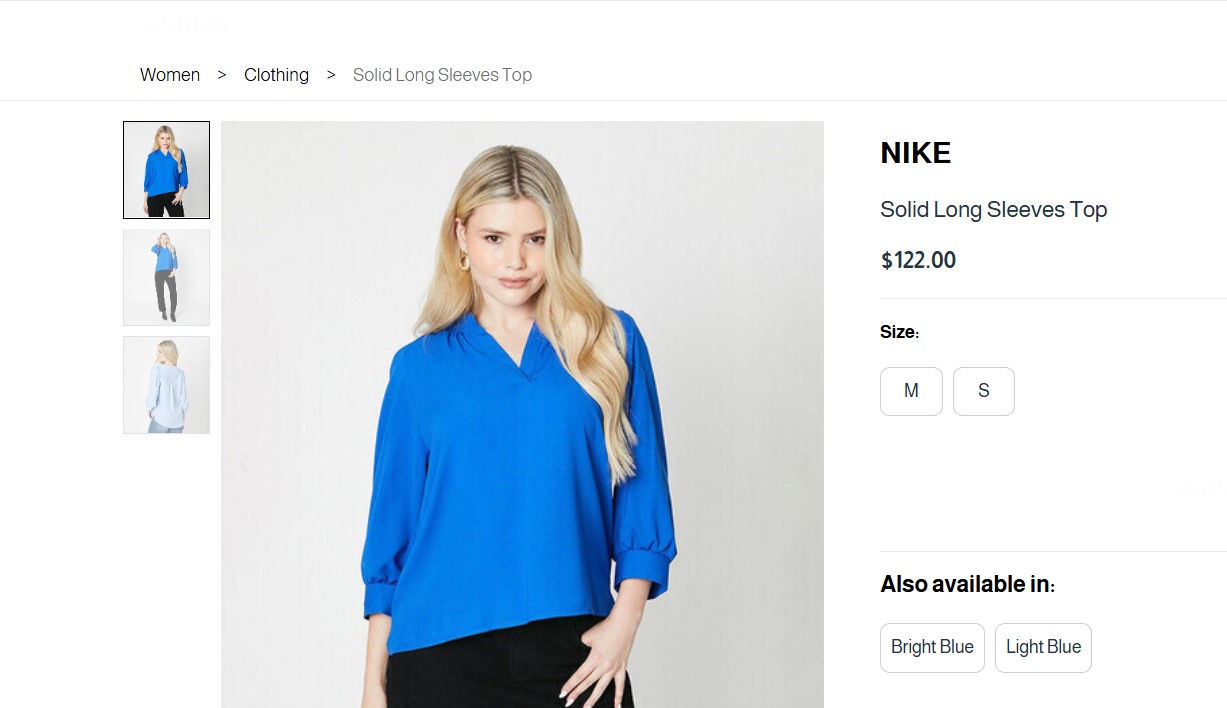
Result
If you add multiple options, all variants will be linked together by default. When you click "Generate Variants", the system will automatically create all possible combinations.
For example, if you add:
· Sizes : M , S
· Color : Bright Blue , Light Blue
The system will generate 4 variants (2 colours × 2 Sizes).
Note: You can assign a unique SKU, Barcode, Cost, Price, and Available Quantity for each generated variant combination.
The product details and variants will appear to the customer as shown in the image below: