How to Add New Categories to Your Cartley Store:
Follow these simple steps to organize your products by adding new categories to your store:
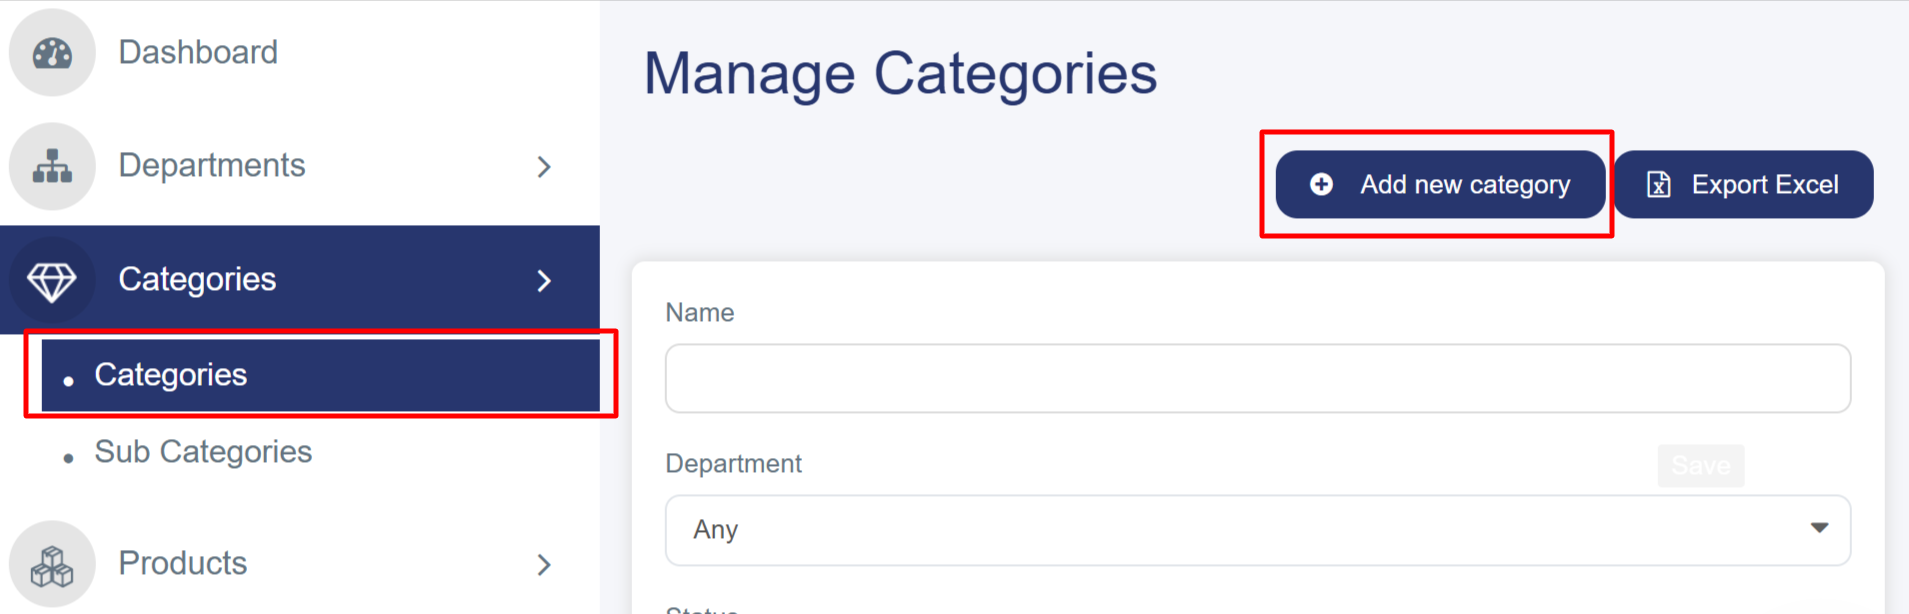
Step 1: Navigate to Categories
1. Log into your Cartley dashboard
2. From the left sidebar menu, click on Categories
3. Select Categories from the submenu (if not already selected)
4. You'll see the "Manage Categories" page with existing categories listed
Step 2: Initiate New Category Creation
1. On the Manage Categories page, click the "Add new category" button (blue button in the top right)
2. This will open the "Add new category" form
Step 3: Filling in Category Details
Basic Information
1. Name: Enter the category name in English.
2. Parent Department: Select the Main Department to which this category will belong.
Description: Add a detailed description of the category to guide your customers
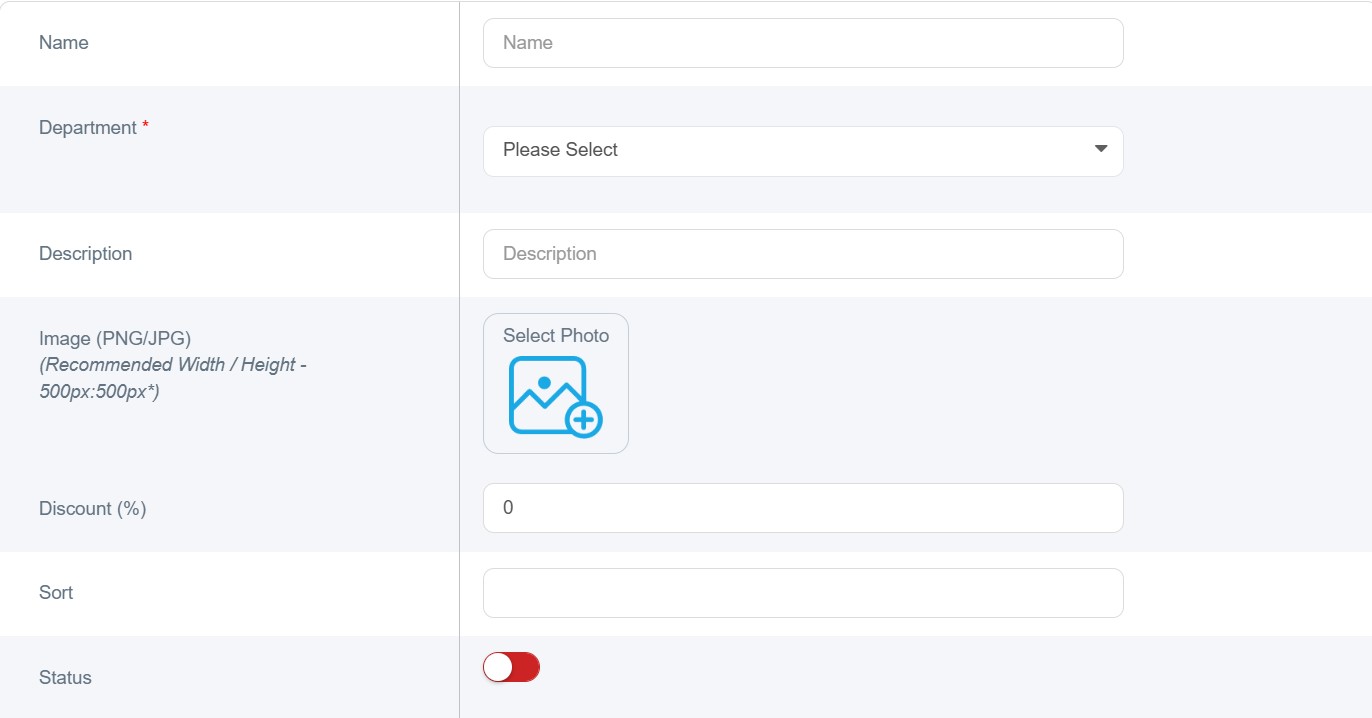
Step 4: Uploading the Category Image
1. Select Image: Click the "Choose Image" button.
2. File Format: Upload your image file. We recommend using (JPG / JPEG) formats.
3. Recommended Dimensions: For optimal display, use 500px × 500px.

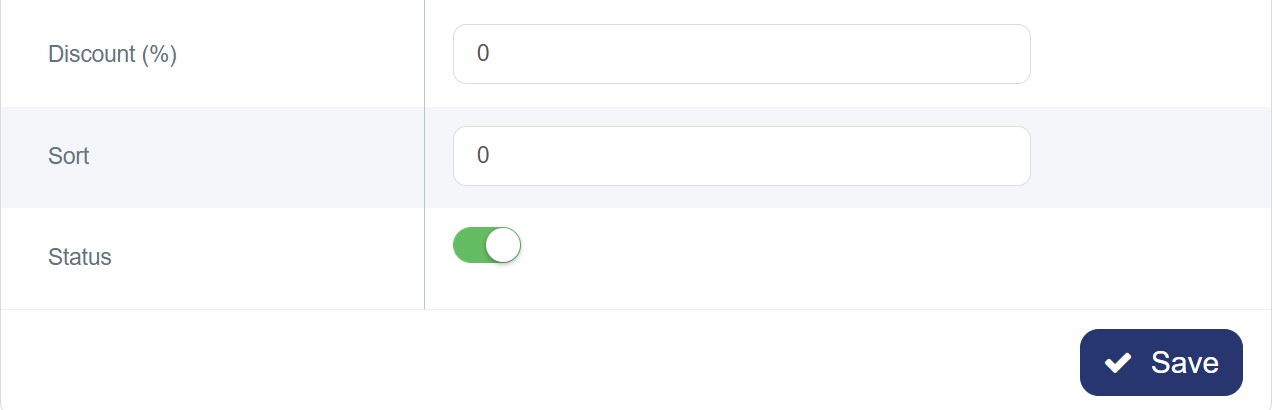
Step 5: Configuring Category Settings
1. Discount (%): Set a default discount percentage for this category (leave blank if no discount applies).
2. Sort Order: Enter a number to determine the display priority (lower numbers appear first).
3. Color: You can customize the category title color for the POS (Point of Sale) system.
4. Hide from Sales Channels: Use this to manage the visibility of the category across your various sales stores.
5. Status: Toggle the switch to Activate or Deactivate the category:
- Red (Off): The category is disabled.
- Green (On): The category is active and visible to customers.
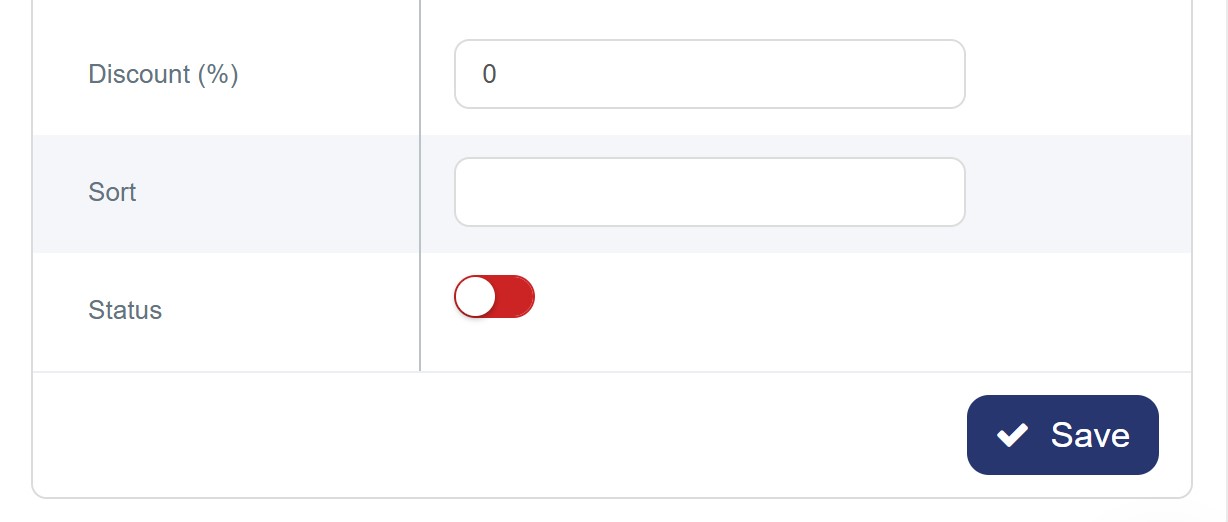
Step 6: Saving the Category
1 1. Review: Carefully review all the information you have entered to ensure accuracy.
2 2.Save: Click the "Save" button (the blue button located at the bottom right).
3 3. Confirmation: The system will create the category and automatically redirect you back to the Categories List.
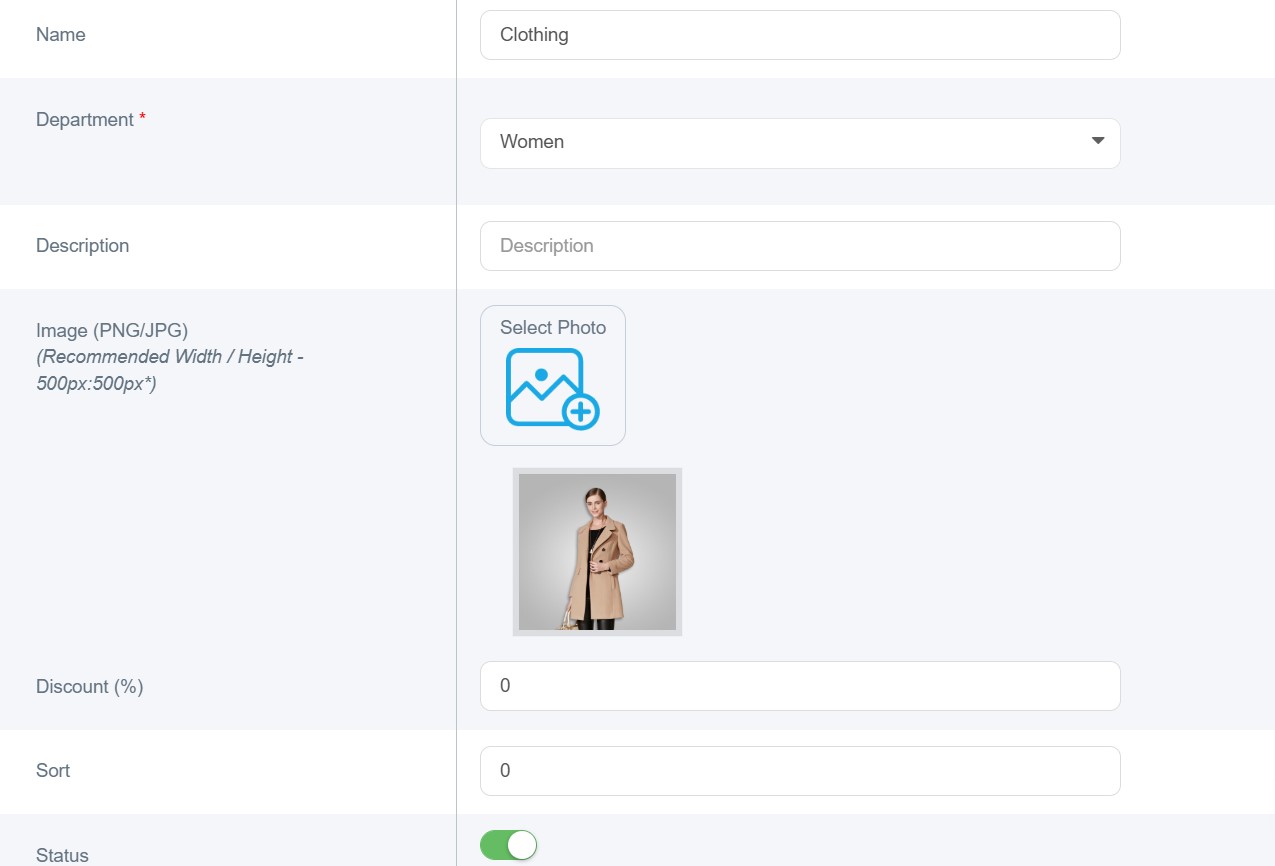
Example:
When adding the Main Category details as shown below:
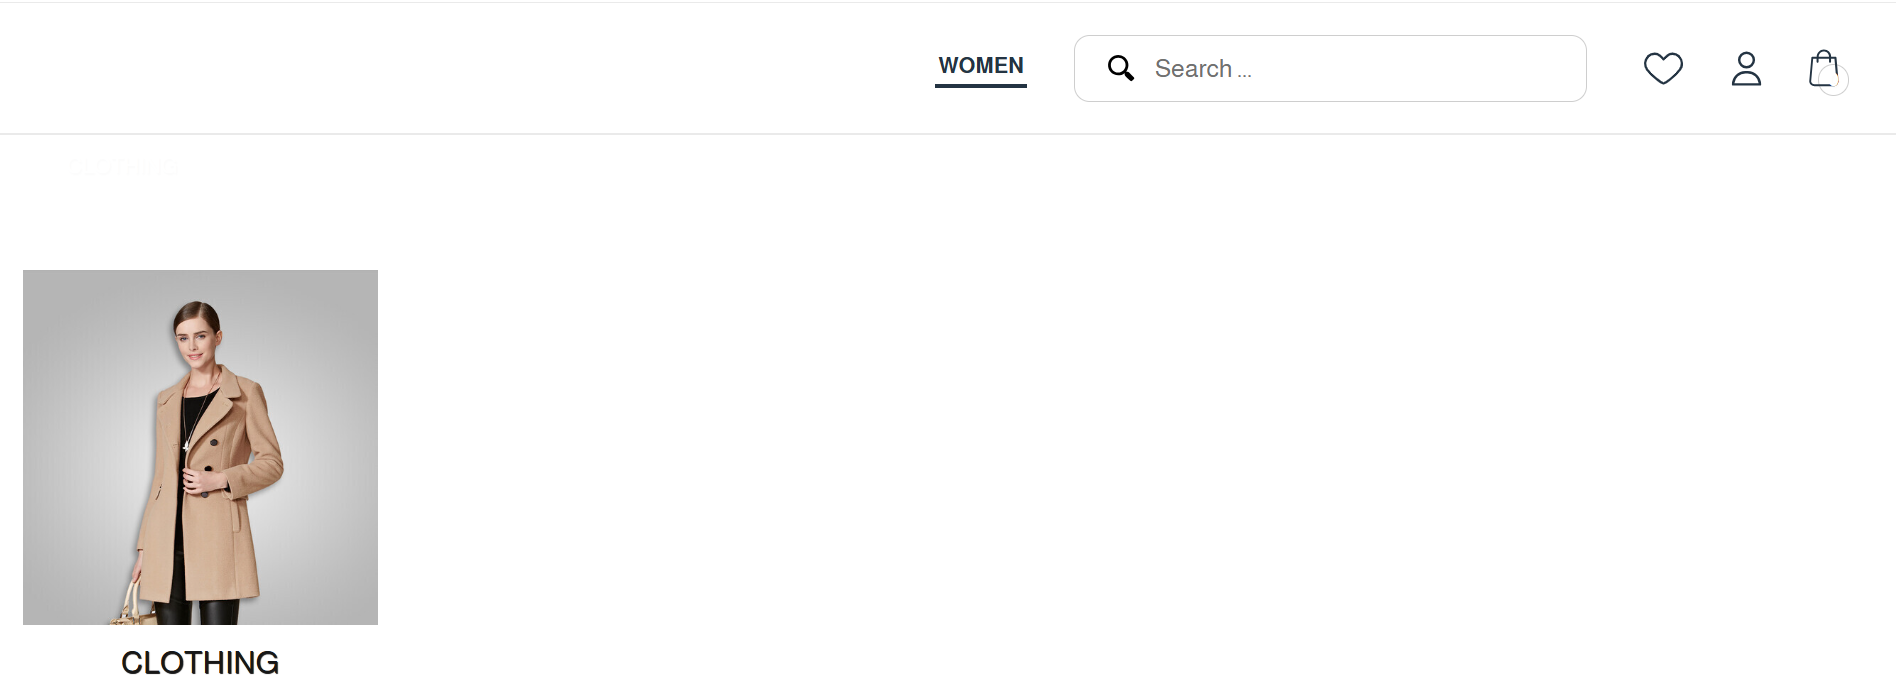
It will be displayed on the website for the customer as shown below:
Post-Creation
- Your new category will appear in the categories list with a unique ID.
- You can edit, delete, or manage products within this category.
- The category status can be toggled on/off as needed.
- You can view the total number of products assigned to this category.

Tips
- Use clear, descriptive names for better user experience.
- Ensure Arabic translations are accurate for bilingual support.
- Choose appropriate sort numbers to organize category display order.
- Upload high-quality images that represent the category well.
Troubleshooting
- If the image you choose isn’t uploading , check file size and format.
- If no image is uploaded ,the default image will appear.
- Category not appearing: ensure the status is set to active (green) or either ensure it has products and not empty.
- Ensure all required fields are completed before saving.