Introduction
Attributes (Properties) are a set of technical specifications that distinguish each product from others and serve as precise criteria for product classification. These attributes appear on the product listing page as a top Filter Bar, allowing the store to organize hundreds of products into specific, easy-to-browse categories.
The Purpose of Using Attributes:
- Customized Search: Enables customers to narrow down the displayed products to include only what matches their actual needs.
- Time-Saving: Instead of searching manually through all devices, results matching the customer's preferences appear with a single click.
- Selection Accuracy: Ensures that the customer does not purchase a device that fails to meet their technical requirements (such as memory capacity or operating system type).
Illustrative Example:
If a customer is looking for a computer dedicated to professional work, they can use the "Material" attribute. Instead of viewing all available devices, the customer selects "Cotton". The system immediately filters out all devices running other systems and displays only the options compatible with that specific OS.
Steps to Add a New Attribute
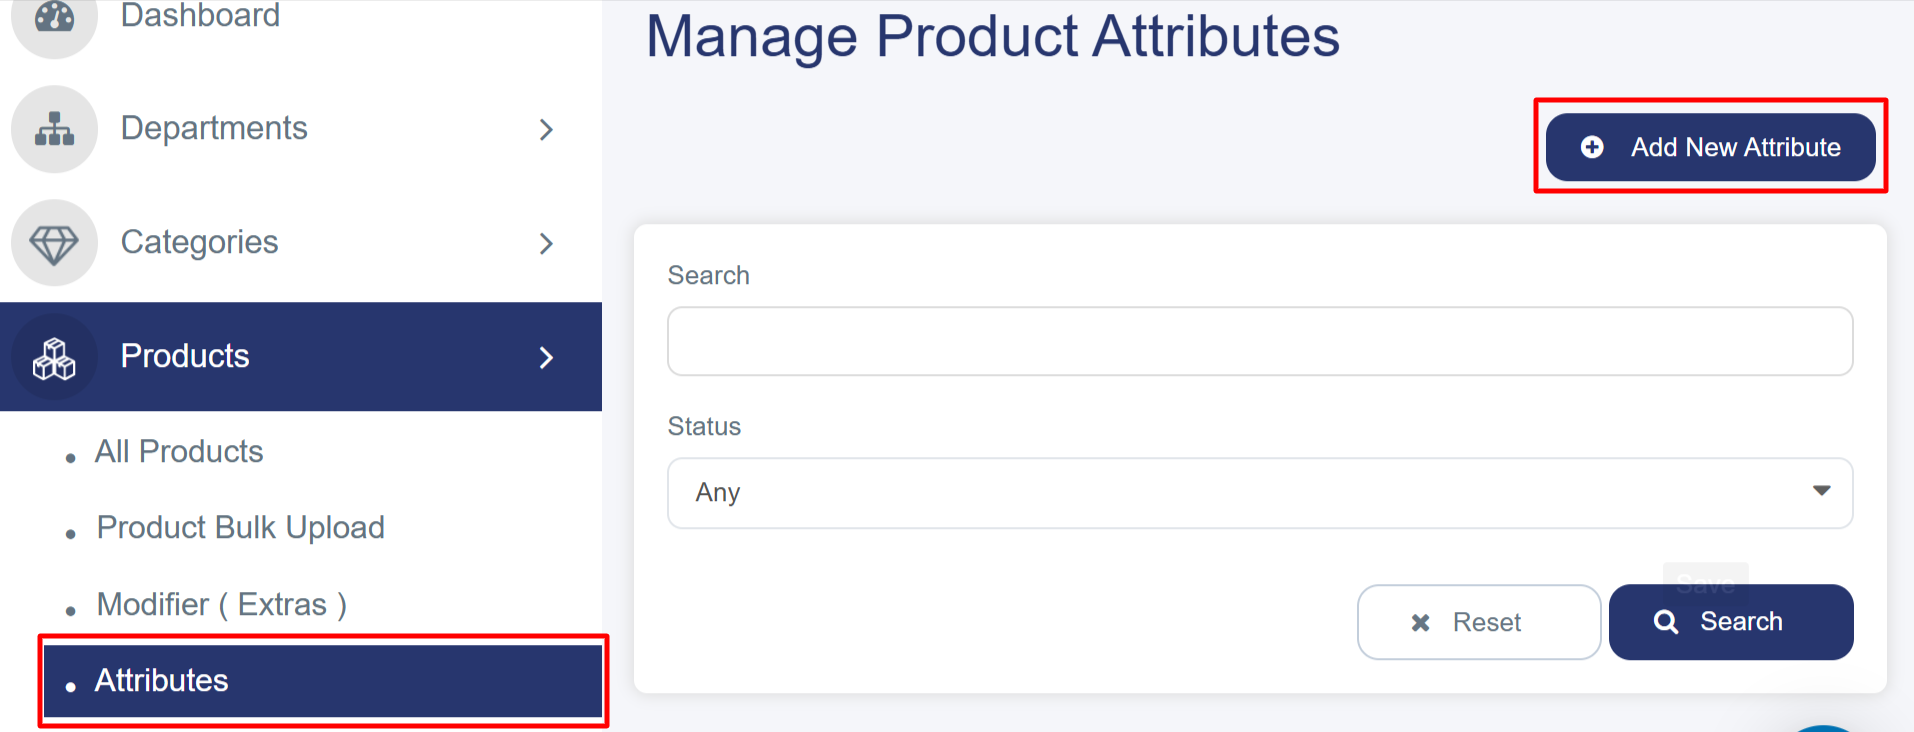
First: Accessing the Attribute Creation Page
- From the left Sidebar, click on "Products".
- Select "Attributes".
- Click the blue "Add New Attribute" button located at the top right.
Second: Completing the "Attribute Details" Tab
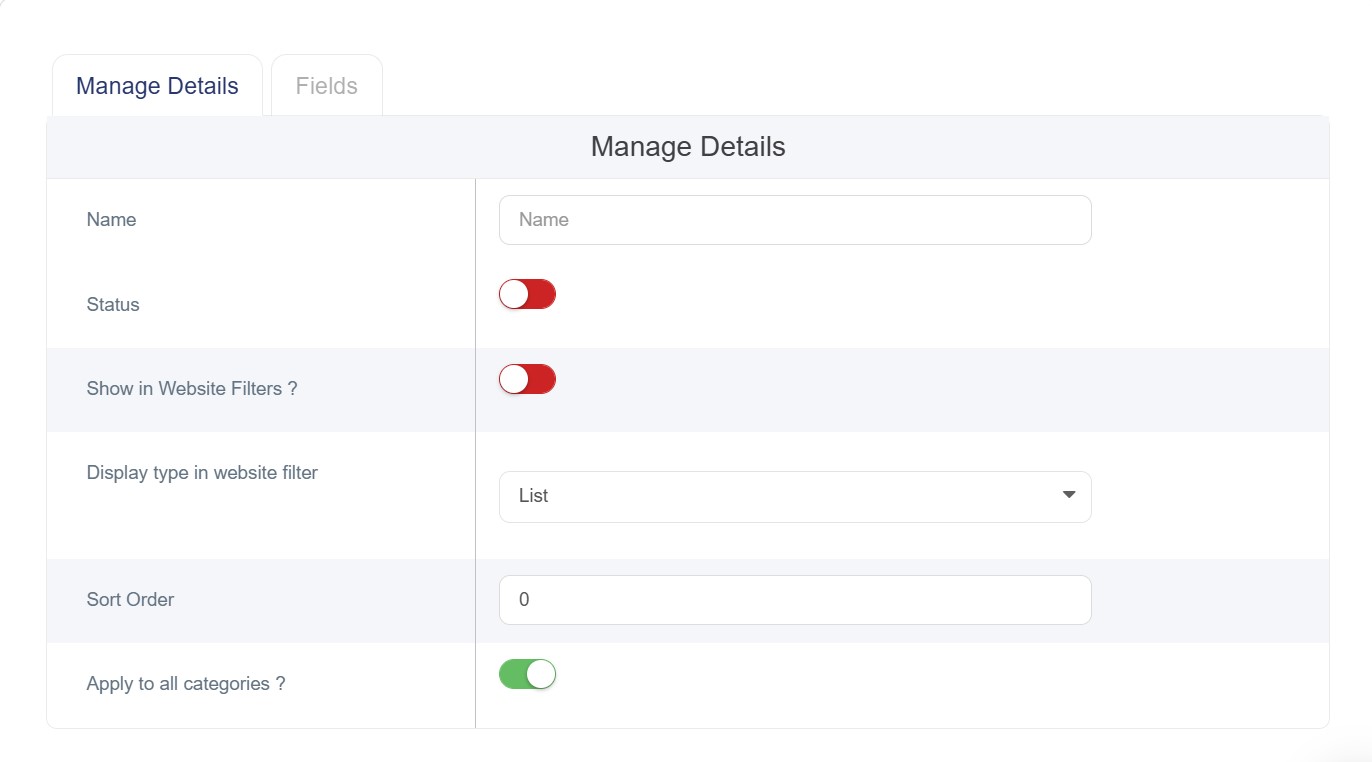
1. Attribute Information
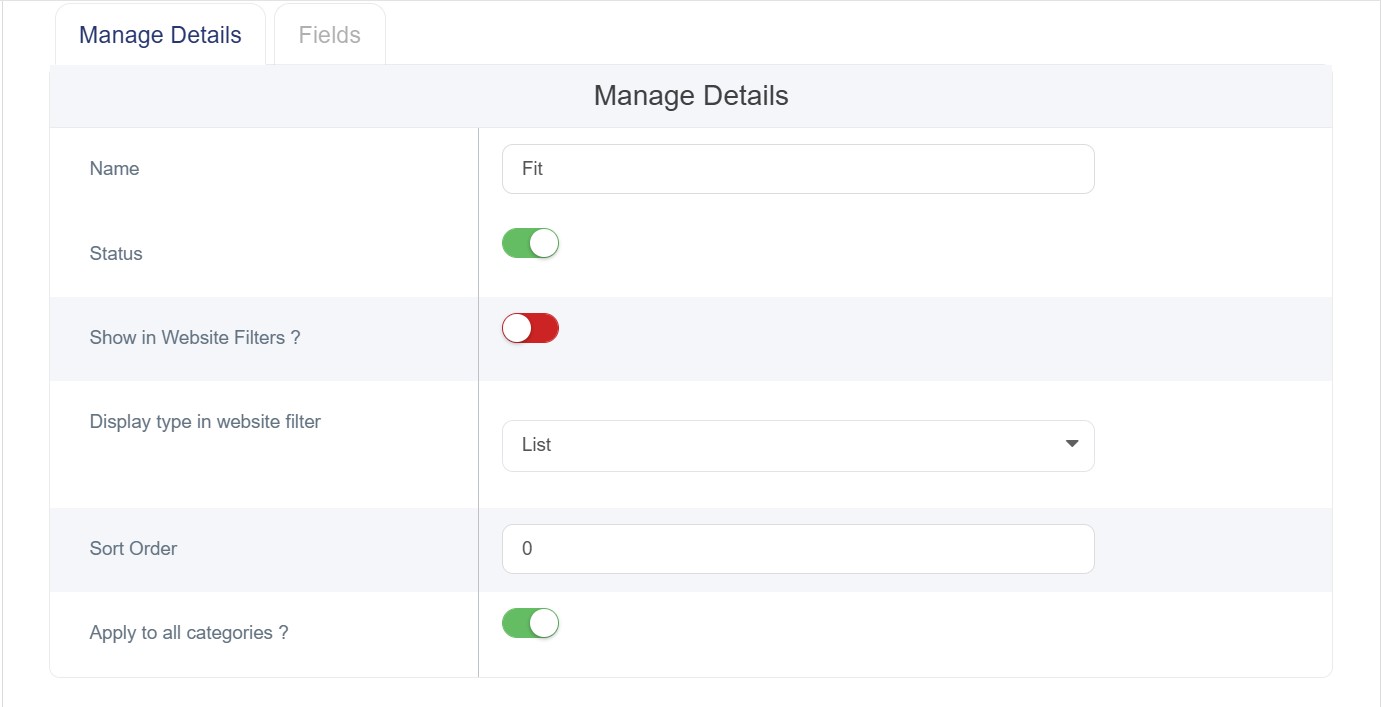
Manage Details:
1. Name: Enter the attribute name in English.
2. Status: Toggle the switch to Activate or Deactivate the attribute:
o Red (Off): The attribute is disabled.
o Green (On): The attribute is active and visible.
3. Enable in Store Filters: Activate the "Show in Store Filters?" option to allow this field to appear as a search tool for customers on the product page.
4. Filter Display Type: Select how the options will appear in the website filter from the dropdown menu:
o List View: Items are displayed vertically (one under the other).
o Grid View: Items are displayed horizontally (side by side in a grid).
5. Sort Order: Enter a number to determine the display priority (lower numbers appear first).
6. Apply to All Categories?
o Red (Off): The attribute is restricted; you can manually select specific Departments and Categories where this attribute should appear.
o Green (On): The attribute will automatically appear across all departments and categories.
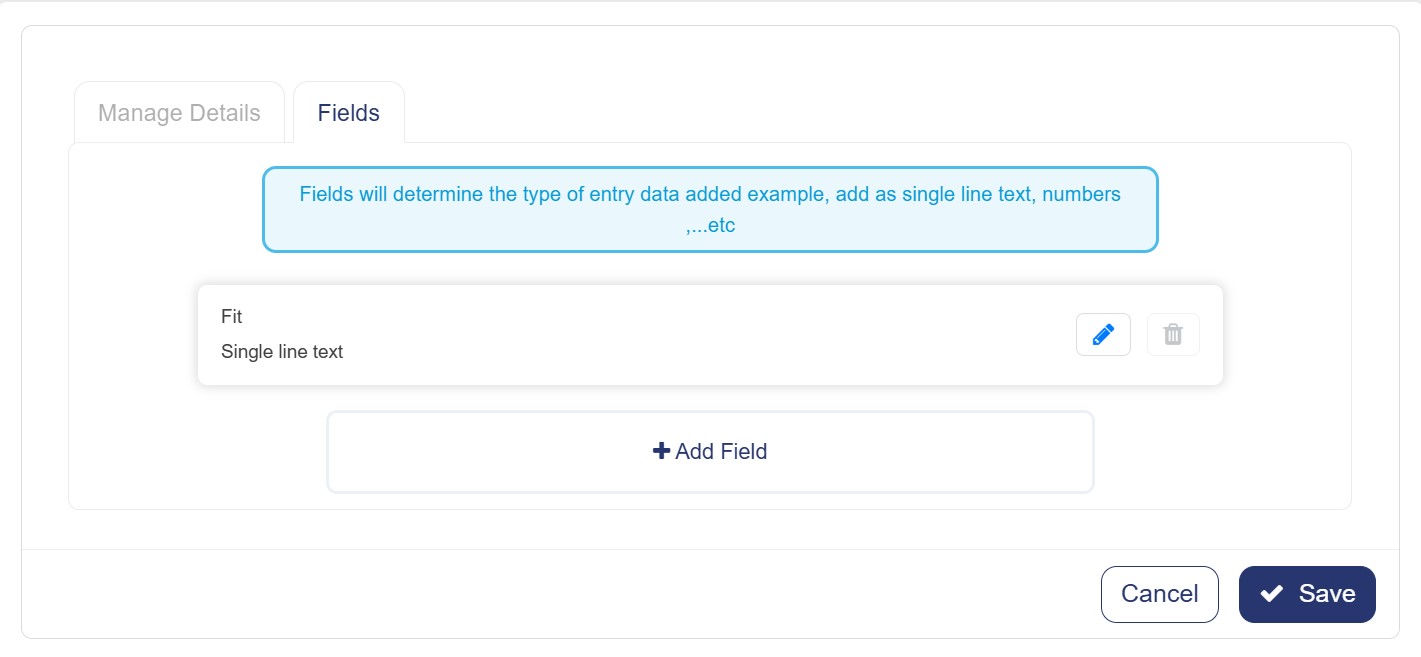
2. Fields
Fields define the data type applied to the input values.
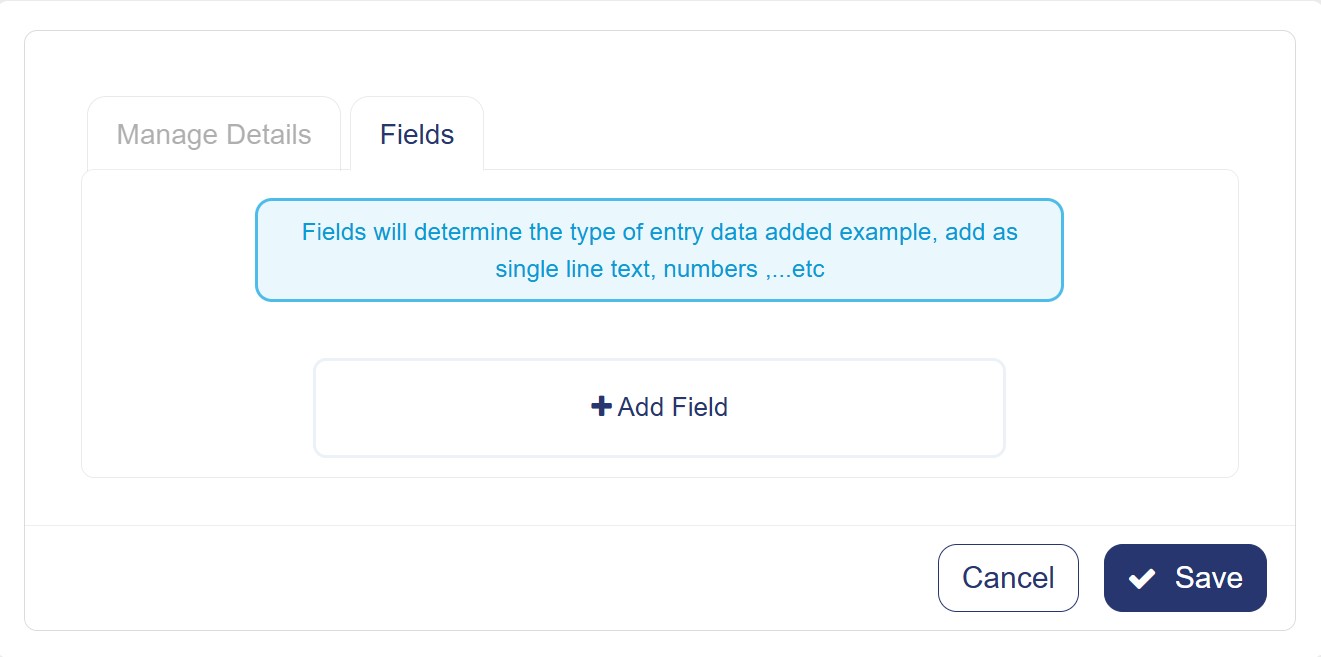
Adding a Field
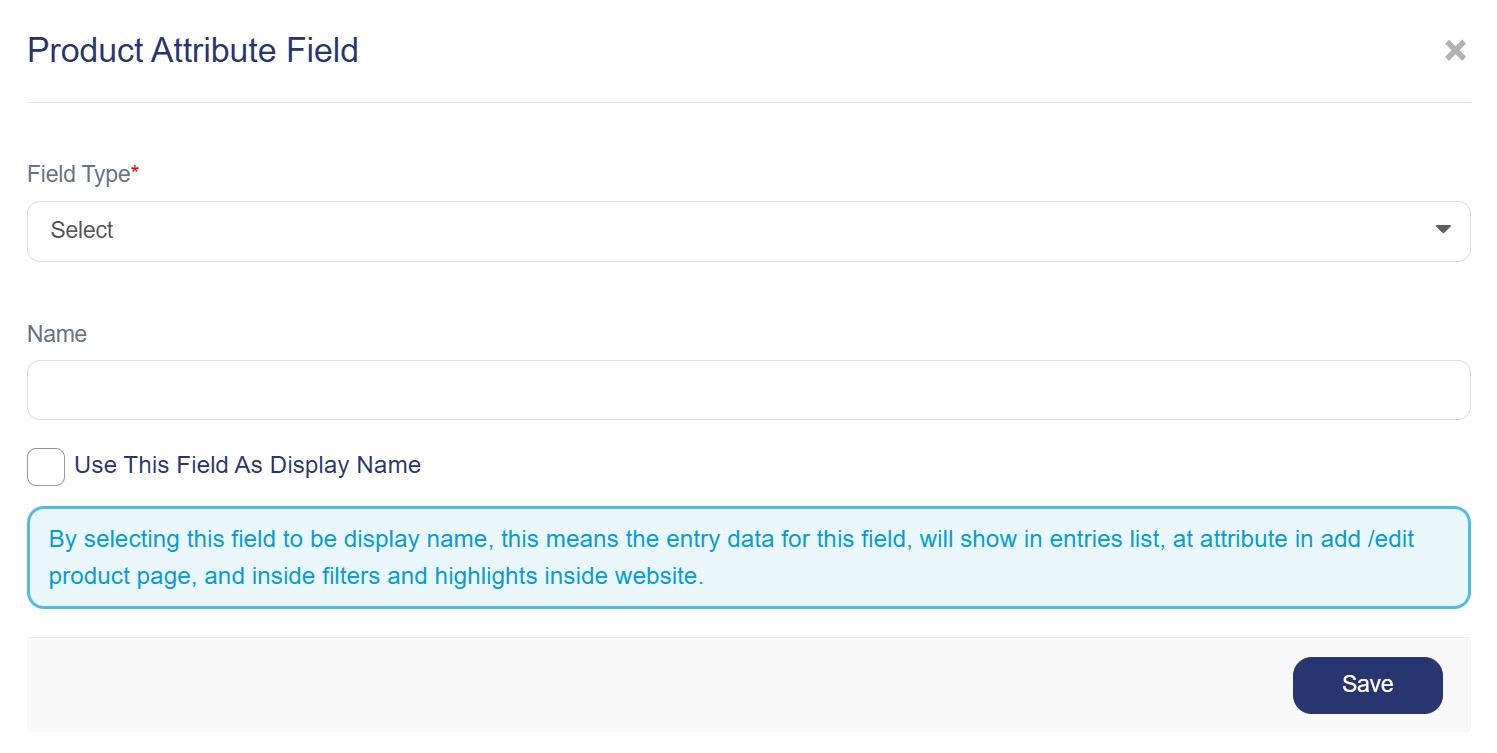
Click on "Add Field". In the "Product Attribute Field" window, follow these steps to set up the attribute's core identity:
1. Field Type: Open the dropdown menu and select the appropriate data type:
o Select "Selection" if you want a predefined list of values.
o Select "Single Line Text" or "Multi-line Text" for free-form entries.
o Select "Color" for color-based inputs.
2. Field Label: Enter the field name
o Name (EN): The field name in English.
§ Example: "Color"
3. Enable Display: Ensure the option "Use this field as a display name" is checked. This ensures that this specific label is visible to customers on the storefront interface.
Third: Saving the Attribute
1. Review: Carefully review all the entered information for accuracy.
2. Save: Click the blue "Save" button located at the bottom right.
3. Confirmation: The system will create the new attribute and automatically redirect you to the Attributes List.
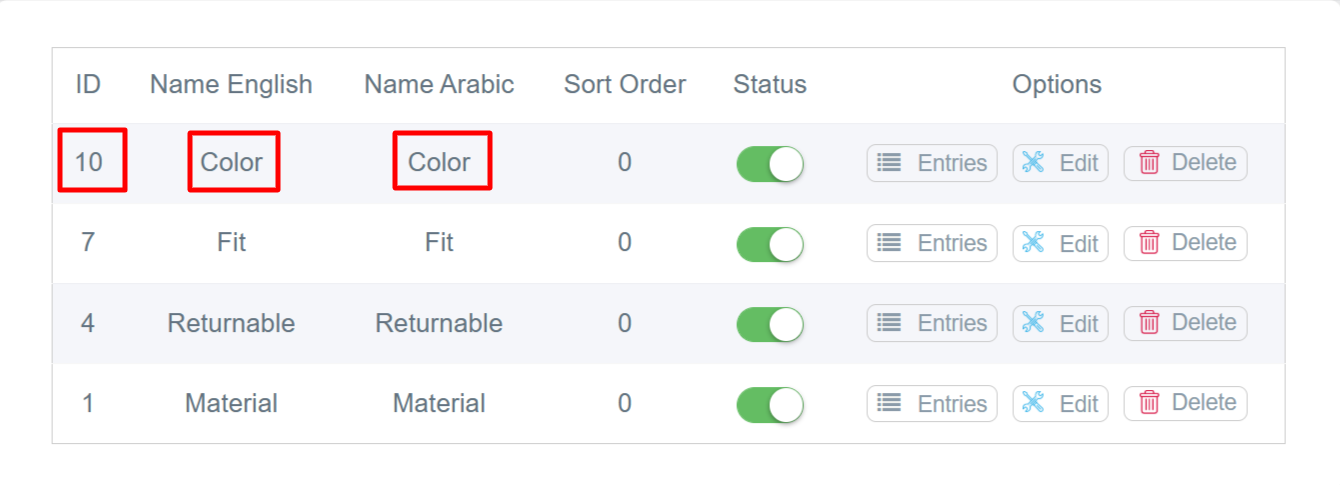
- "Once the new attribute is created, it will appear in the Attributes List with a unique ID, as shown below:"
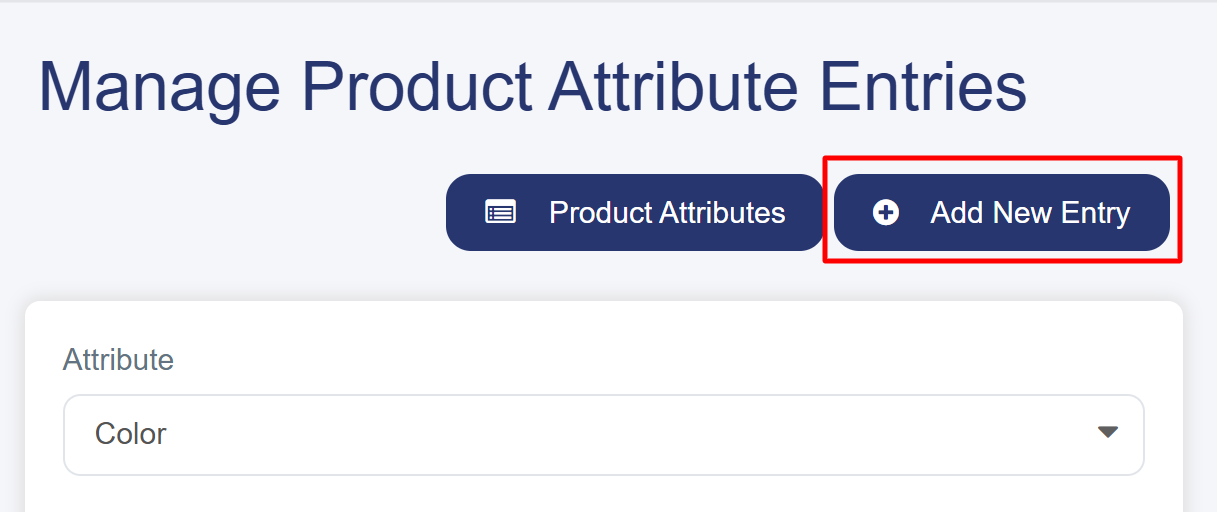
Steps to Add a New Entry
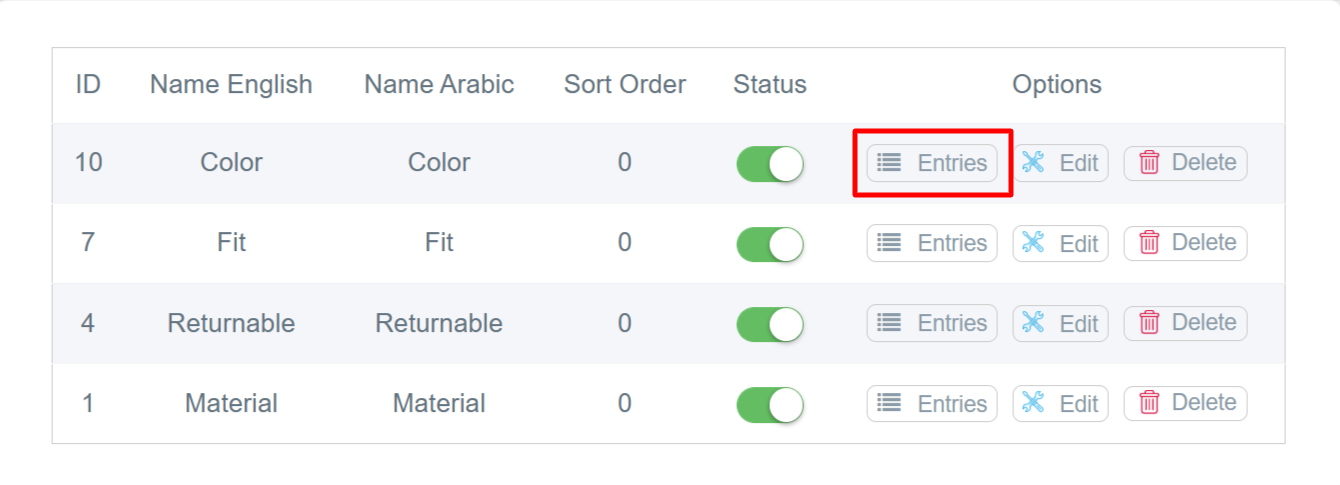
By clicking the "Entries" button, you can manage product attribute entries and add specific values related to the attribute.
1. Click the "Add New Entry" button at the top right of the screen.
Filling in the Attribute Entry Details
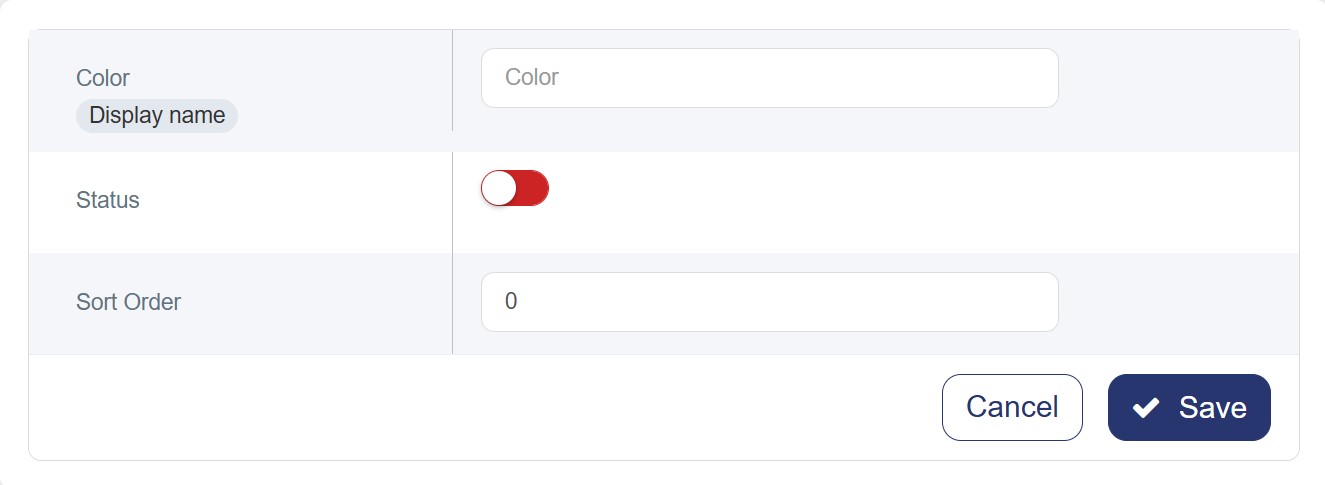
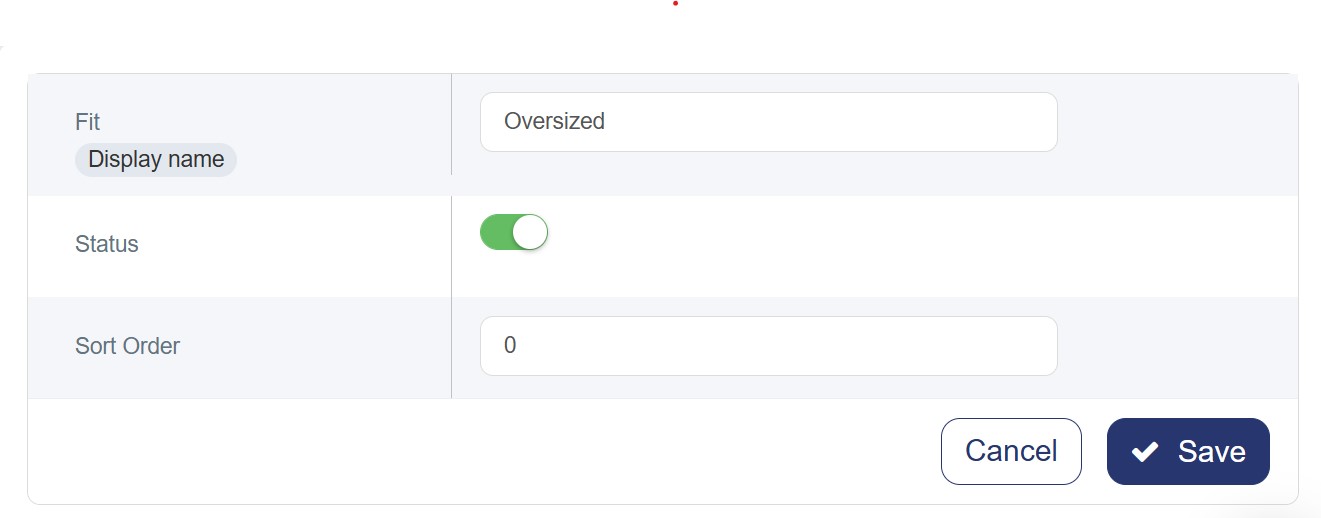
1. Entry Name (English): Enter the specific value for the attribute in both English
-
"Display Name" Label: You will notice a small label next to the English name. This indicates that this specific field is what the customer will see as the filter title on the storefront.
2. Status Toggle:
-
Red (Off): The entry is disabled.
-
Green (On): The entry is active and will appear on the main product pages, allowing customers to select it to filter product specifications.
3. Sort Order: The number (0) or any numerical value determines the display priority in the filter list. The lower the number, the higher the entry appears in the list relative to others.
"Note: This entry is related to the Operating System attribute."
Illustrative Example for All Steps:
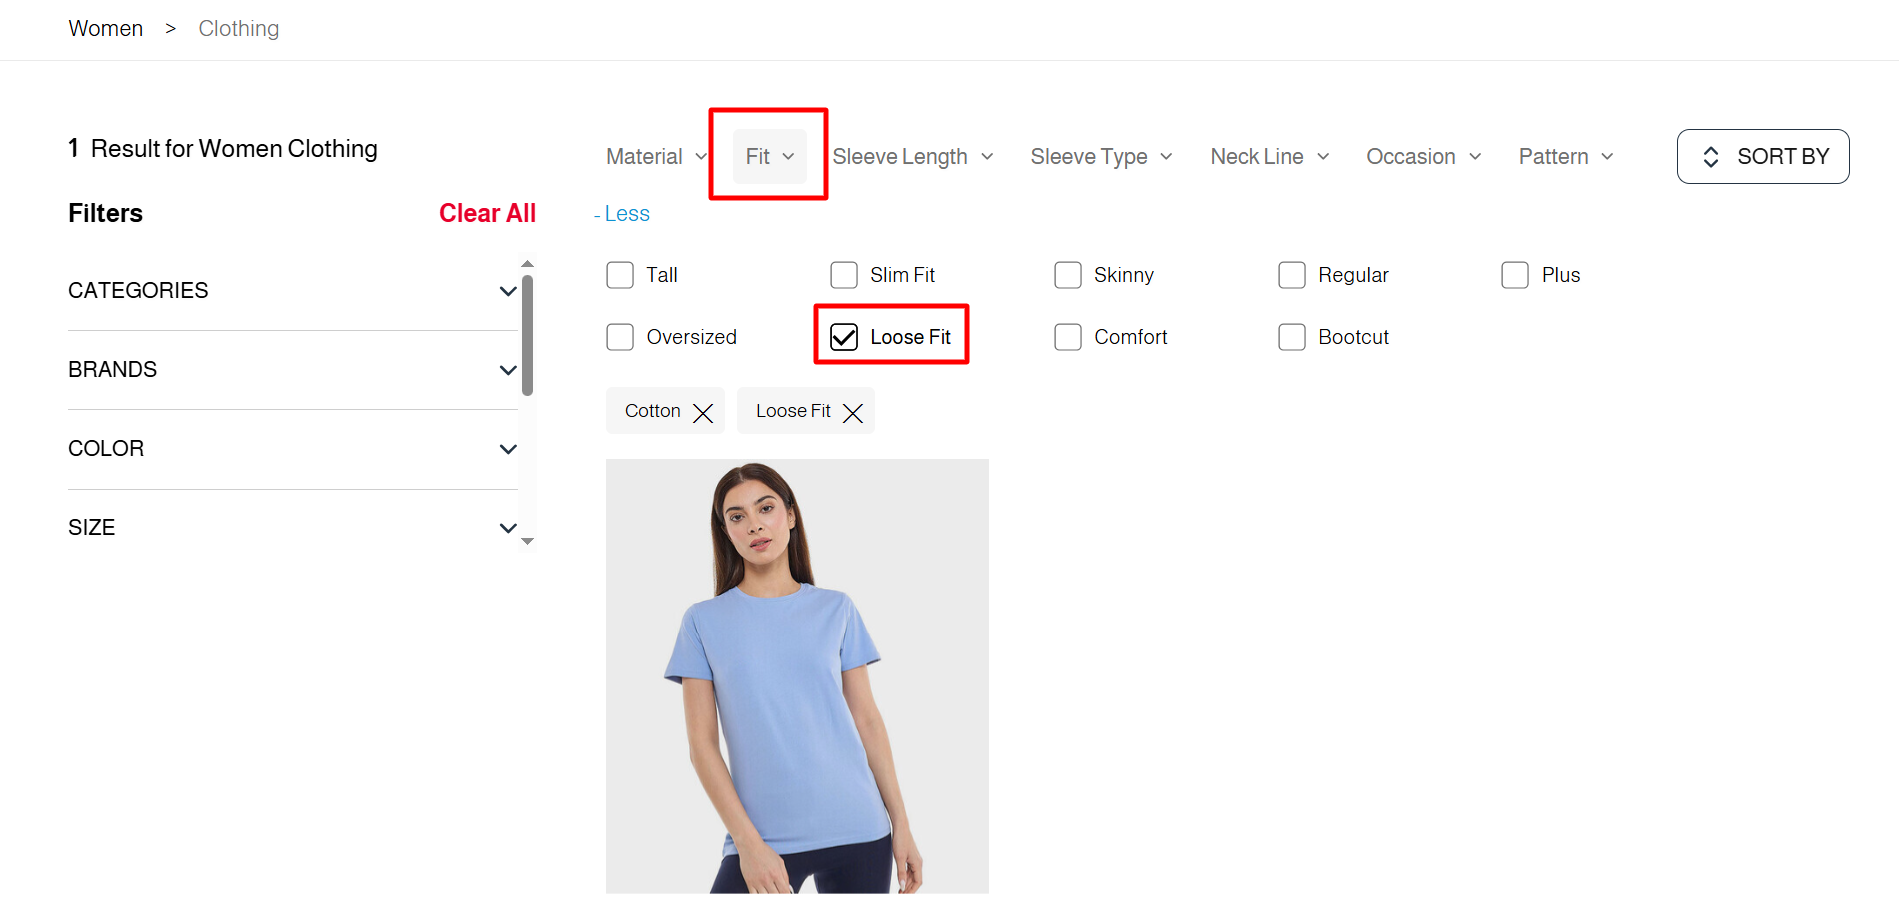
"A new attribute has been added named 'Fit,' including its specific field (Fit), as shown below:"
Loose Fit has been added as an entry for the Fit attribute, as shown in the image below:"
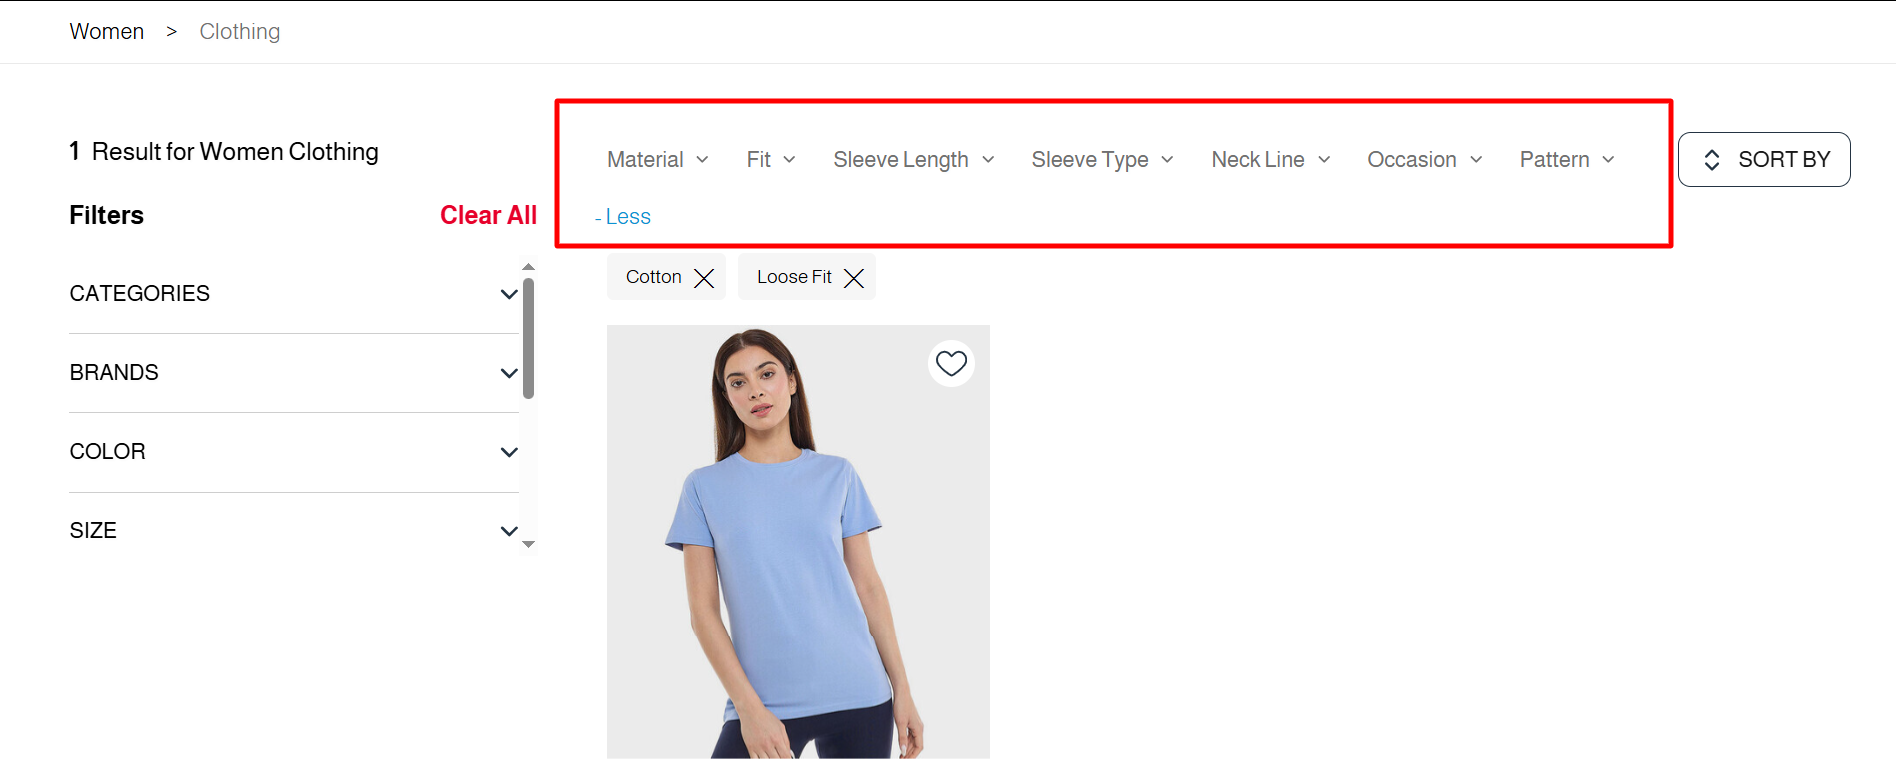
Once selected (by clicking Fit ), the search results will display only the products specifically associated with the Loose Fit ."